Advanced Teleop
In the previous post we saw how to connect a gamepad to our system to simplify the process of driving the robot manually, called teleoperation. In this post we'll look at some more advanced tools, tips, and tricks to improve our teleoperation experience.
Streaming to a phone/tablet
The arrangement we had at the end of the previous tutorial is pretty good. We can sit back at our workstation, with our gamepad and RViz, driving our robot around, seeing what it’s seeing.
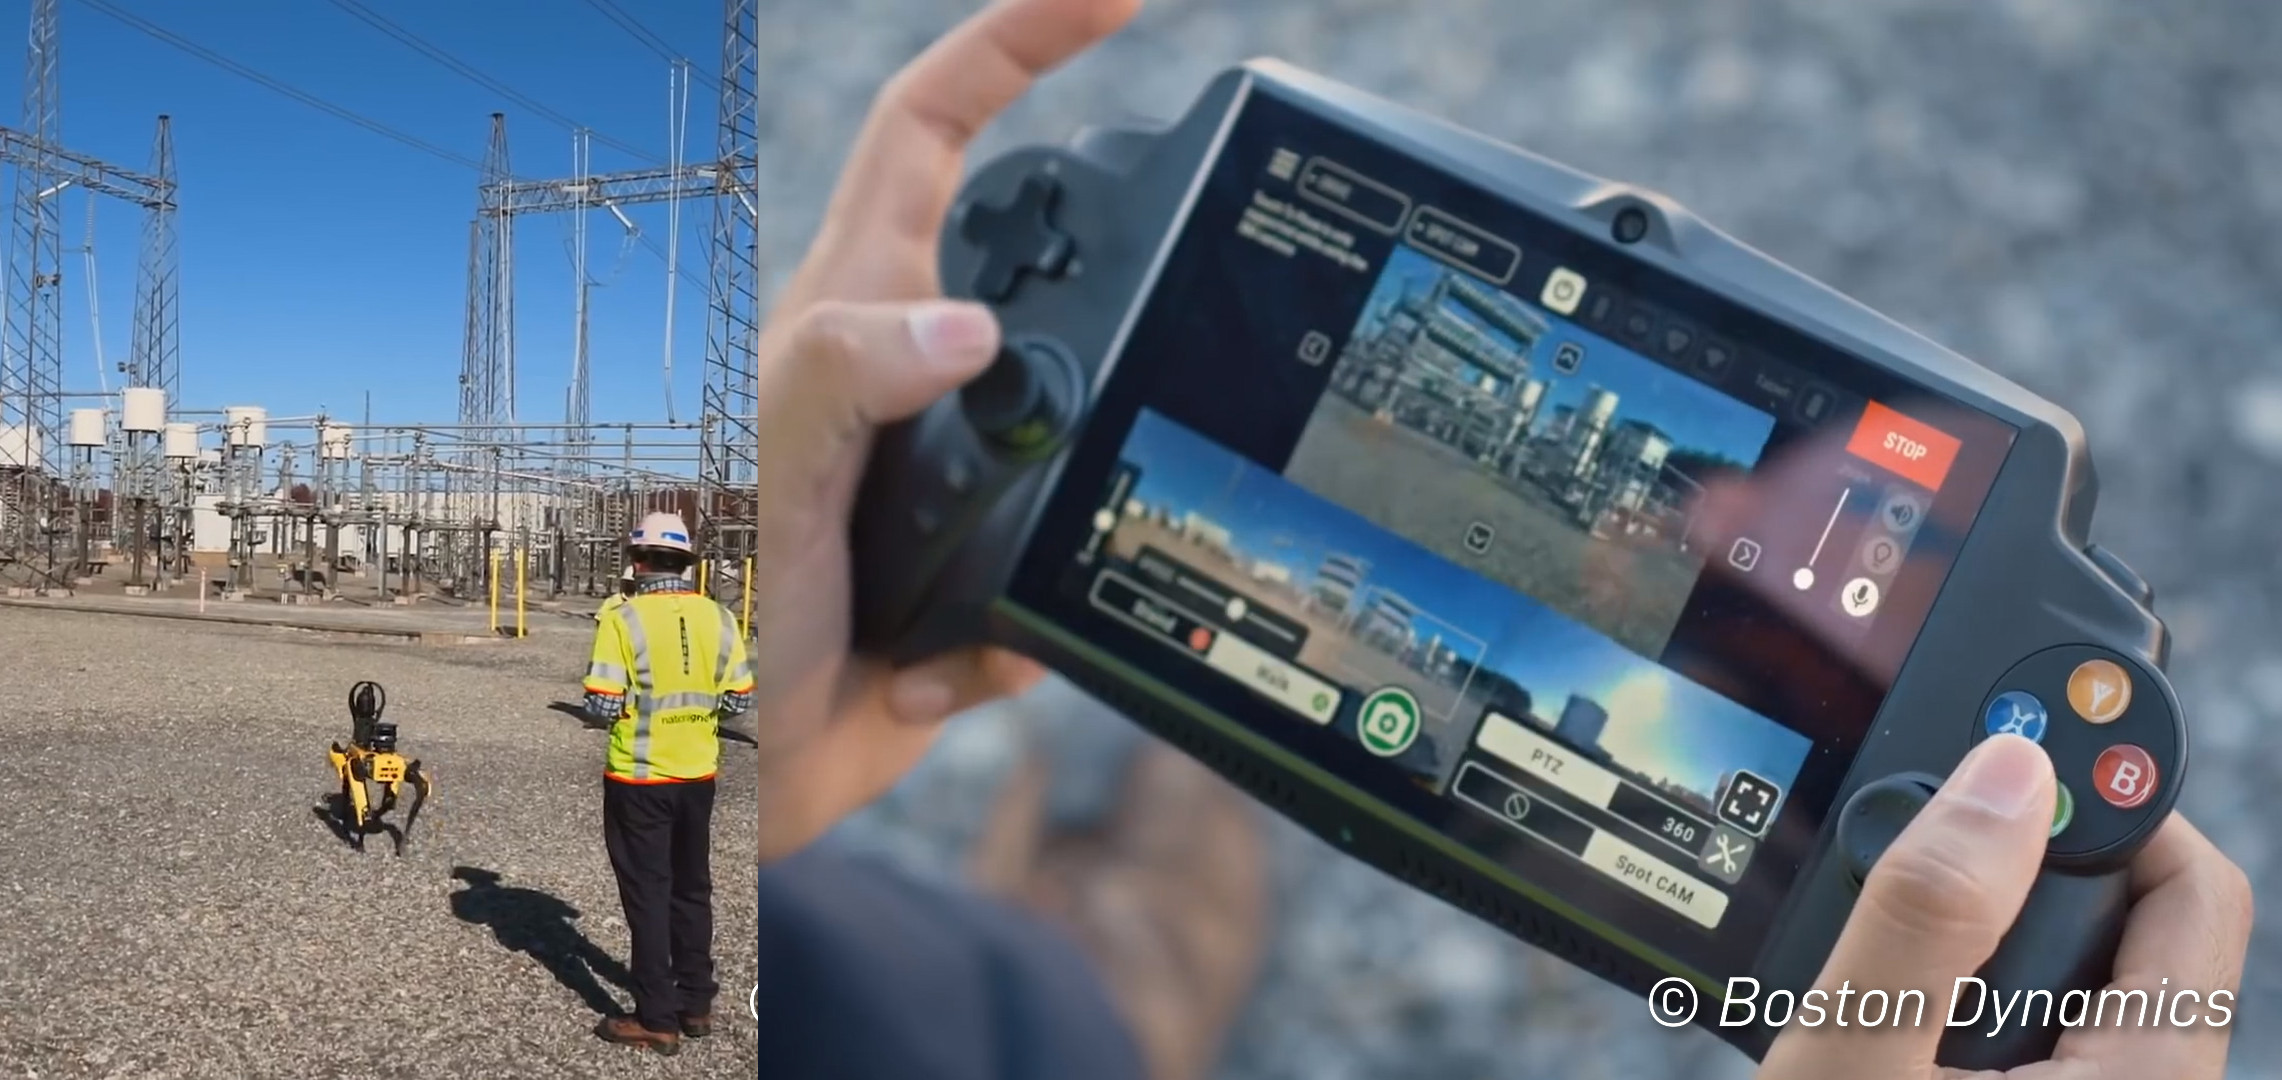
But sometimes we want to be more mobile than that. A great example of that is with the Spot dogs from Boston Dynamics. In their demos we see operators and robots working together in places like construction sites, and the operator wanders around with this handheld device from which they can control everything.
I think that Valve's Steam Deck and similar products are going to be really valuable for this kind of development in the future but unfortunately right now availability is limited (and it has not even been released here in Australia).
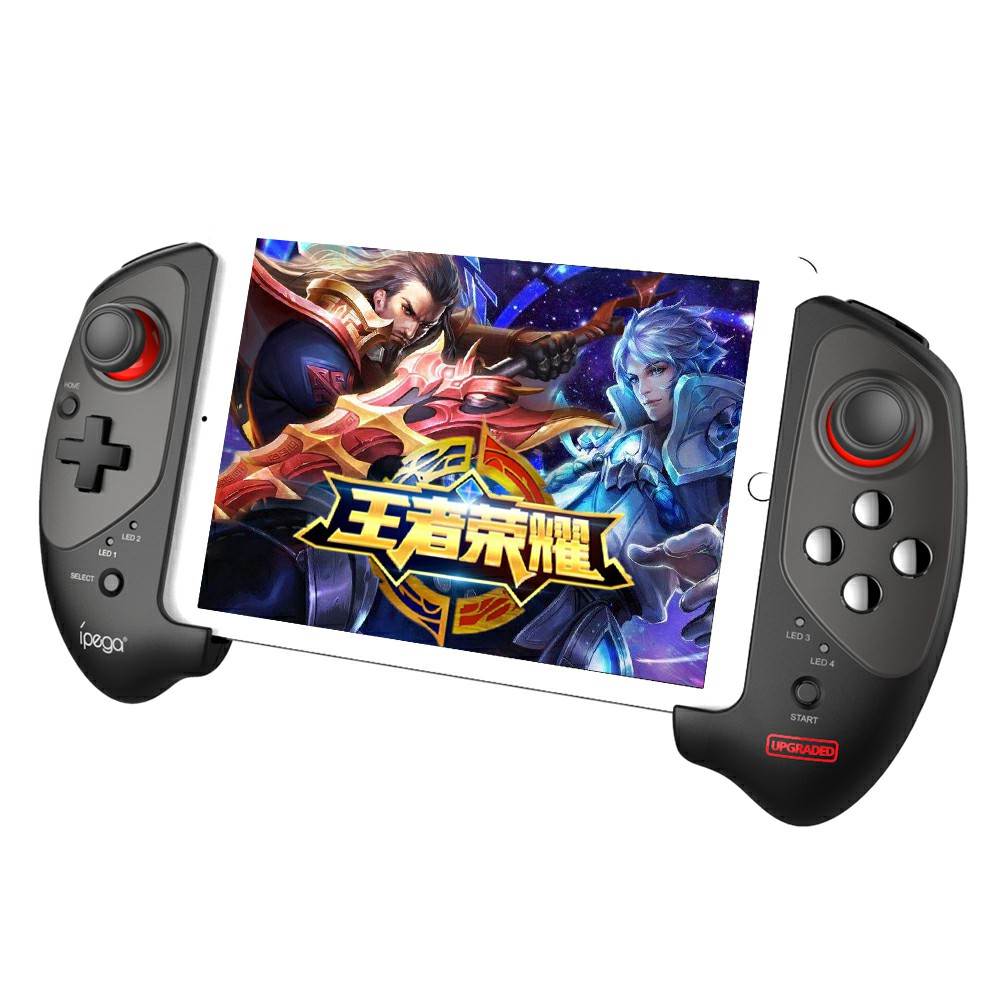
We're going to have a go at doing this ourselves. The following method (and the one in the subsequent section) runs in a browser, which means that we are not limited to watching from a computer, and can instead use phones and tablets as well. For control, we can connect USB or Bluetooth controllers like the one below (that is the one I used, though I would not necessarily recommend it), or on-screen buttons.
The instructions will be kept fairly brief, but are hopefully sufficient to guide through the process.
Warning, this next procedure is something that I hacked together almost two years ago and have not sunk any time into improving since. It is not an example of good code, and it does not run very well, it is just an interesting proof of concept.
Set up web server
The first step is to get a web server running. We'll serve it from the dev machine, and also test it on there.
- Install Node.js v16 on the dev machine from NodeSource binary distributions
- Clone my ros-ui-react package somewhere on the machine (note that this is not a ROS package)
- In the root of
ros-ui-react, runnpm installto download dependencies andnpm run buildto build/rebuild (if you make future modifications, you will need to rerunnpm run build). - Using a text editor, make the following changes to files in the
example/subdirectory:- Create a file called
.env(i.e.example/.env) with the contentsSKIP_PREFLIGHT_CHECK=true. - (Alternatively you could run
echo SKIP_PREFLIGHT_CHECK=true > .envfrom a terminal in the example directory) - In
src/RealGamepadDemo.jsandsrc/SimGamepadDemo.js, change the IP addresses (and if necessary, ports and ROS topics) for theImageStreamandRealGamepadelements. More on this below.
- Create a file called
- Run
npm installfrom the example directory to install dependencies - Run
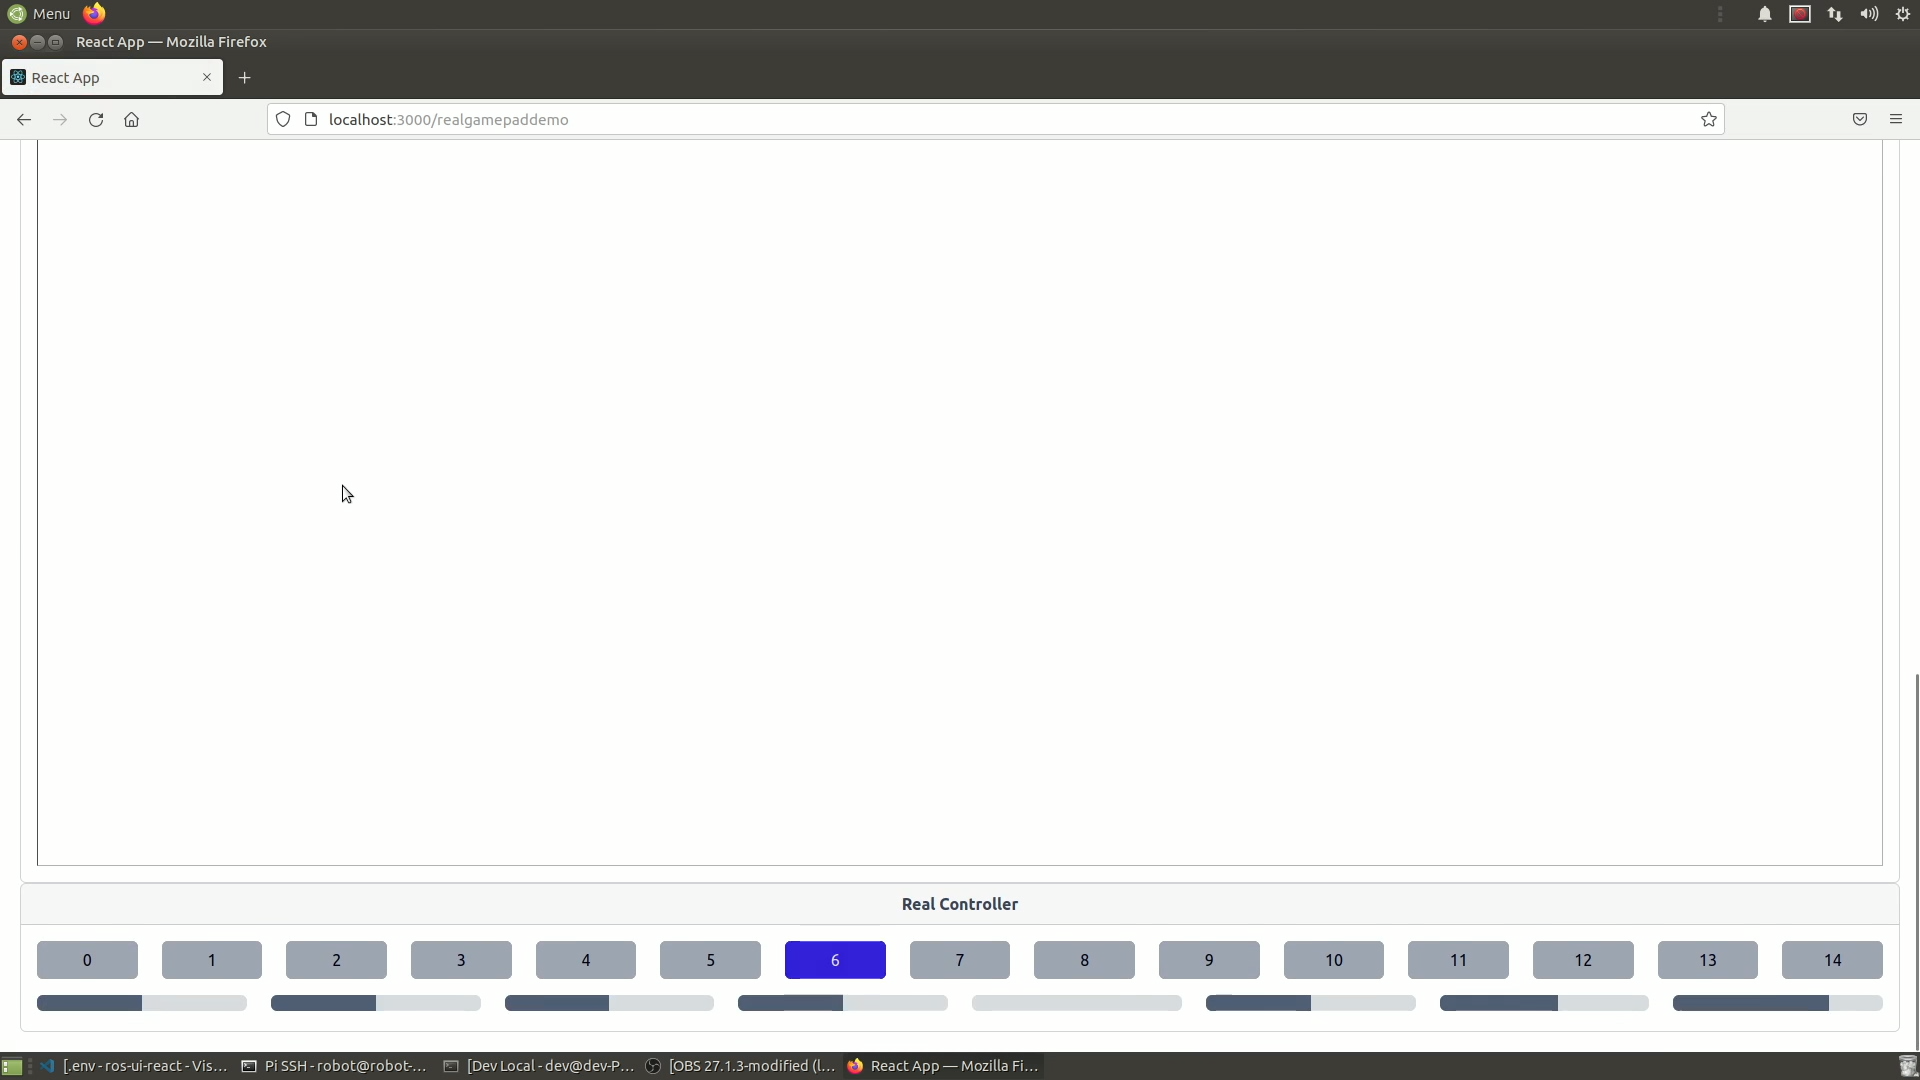
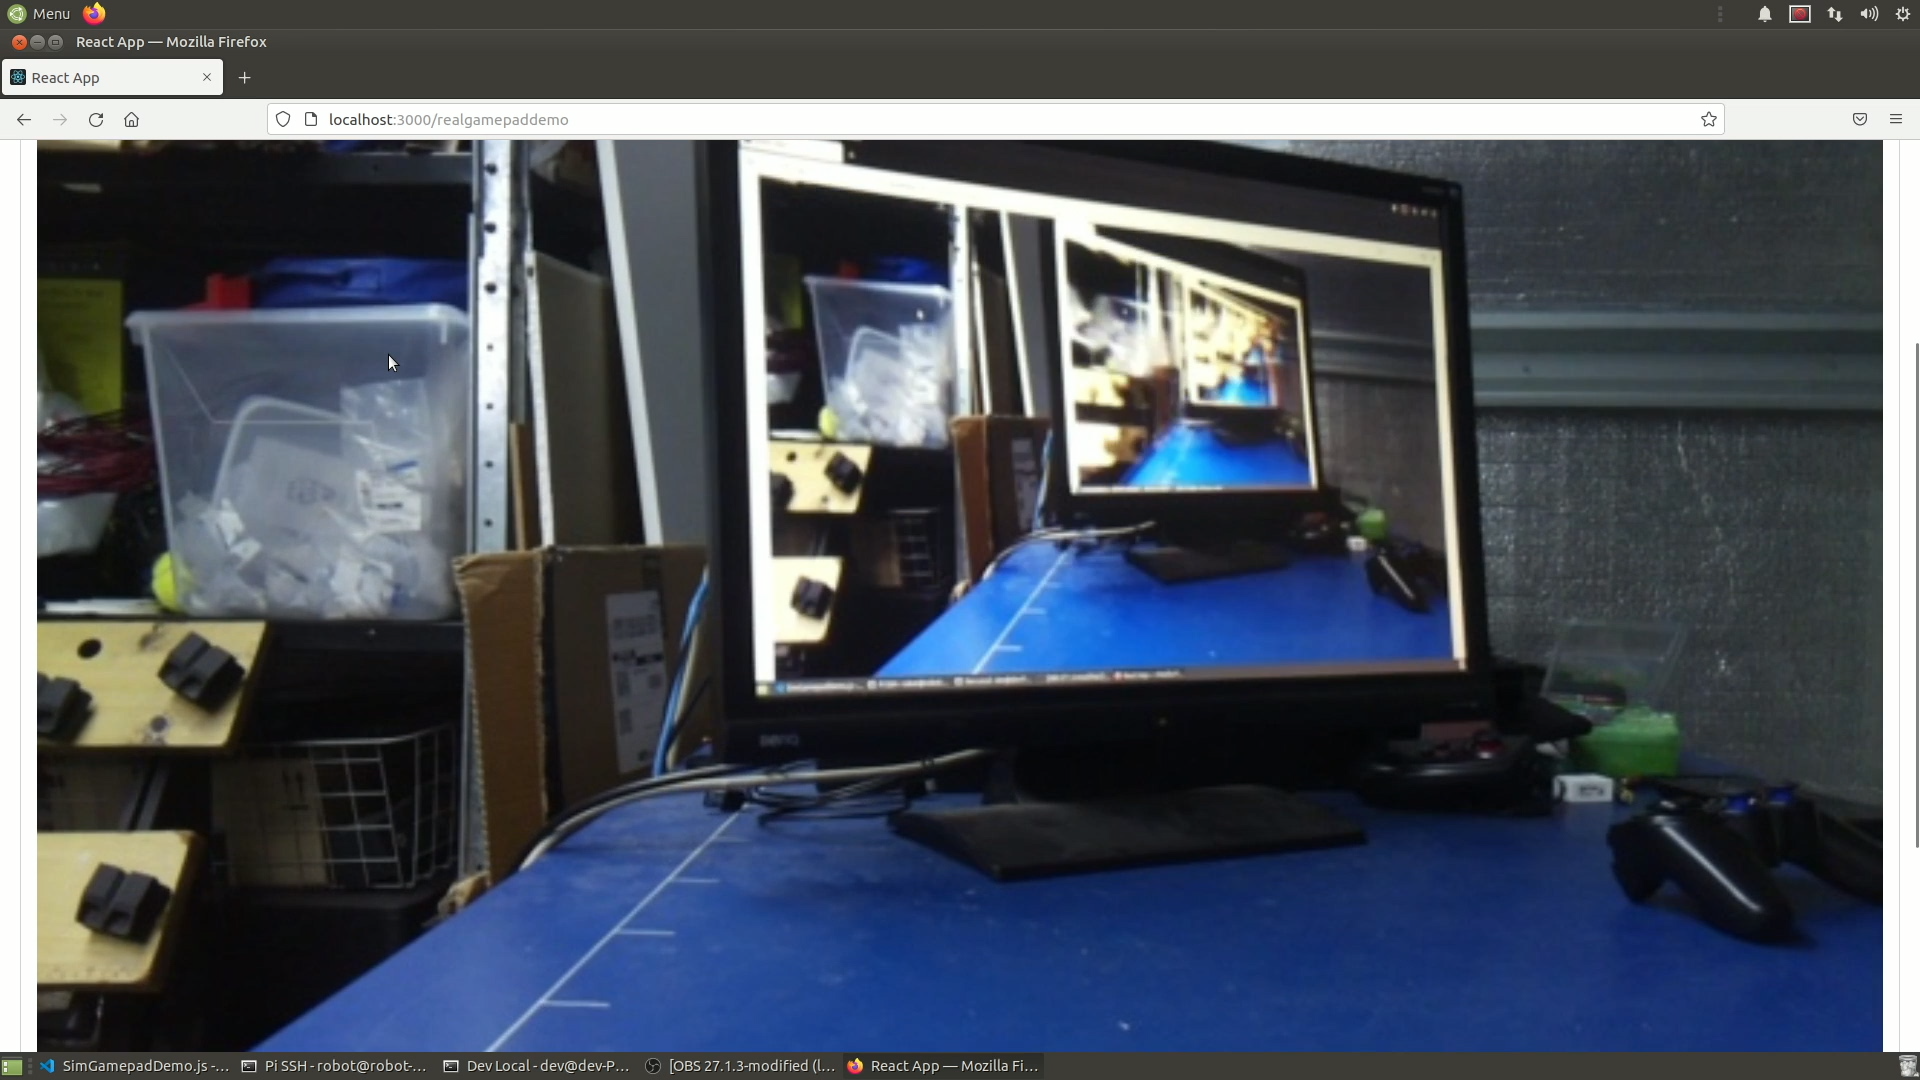
npm startfrom the example directory to start the web server - A browser should automatically pop up once the page is built. If it doesn't, navigate to
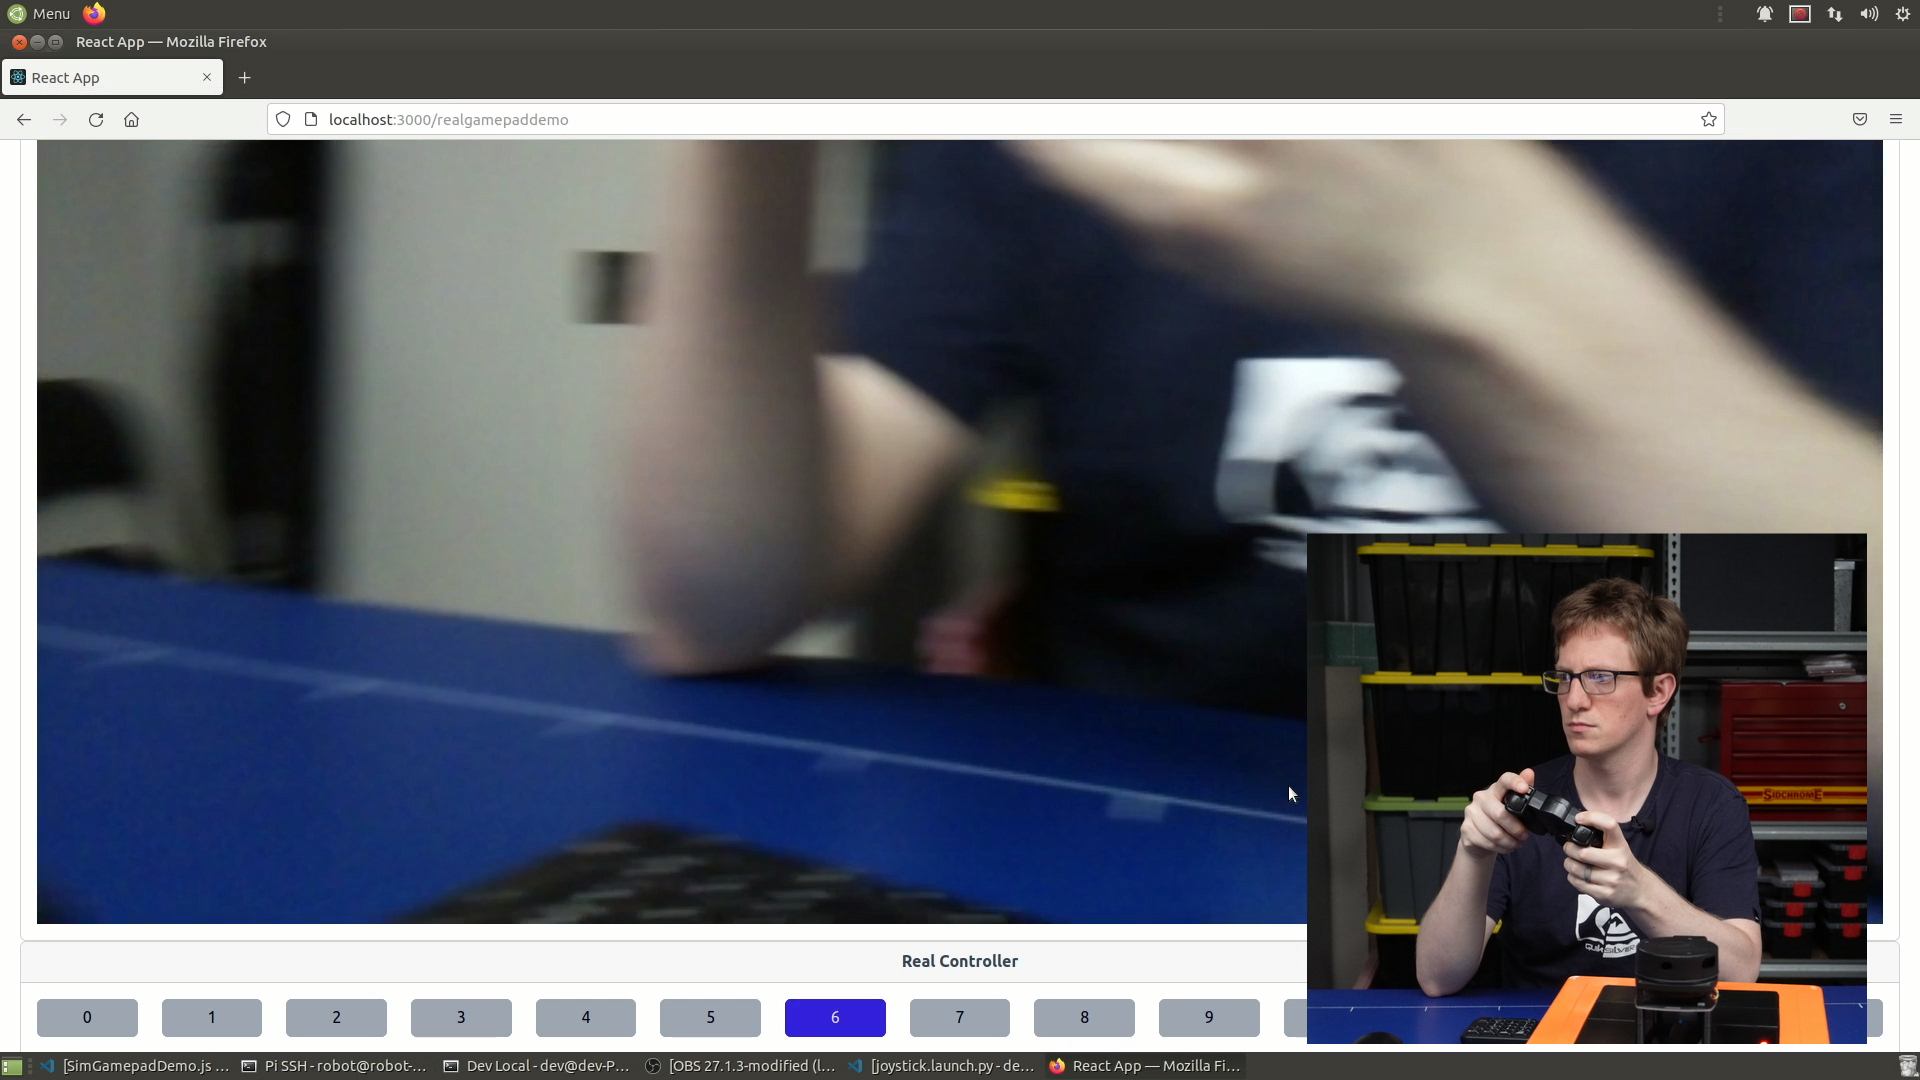
localhost:3000/. Try clicking on "Real Gamepad Demo", and if you have a gamepad connected, pressing buttons on it should cause them to appear on screen.
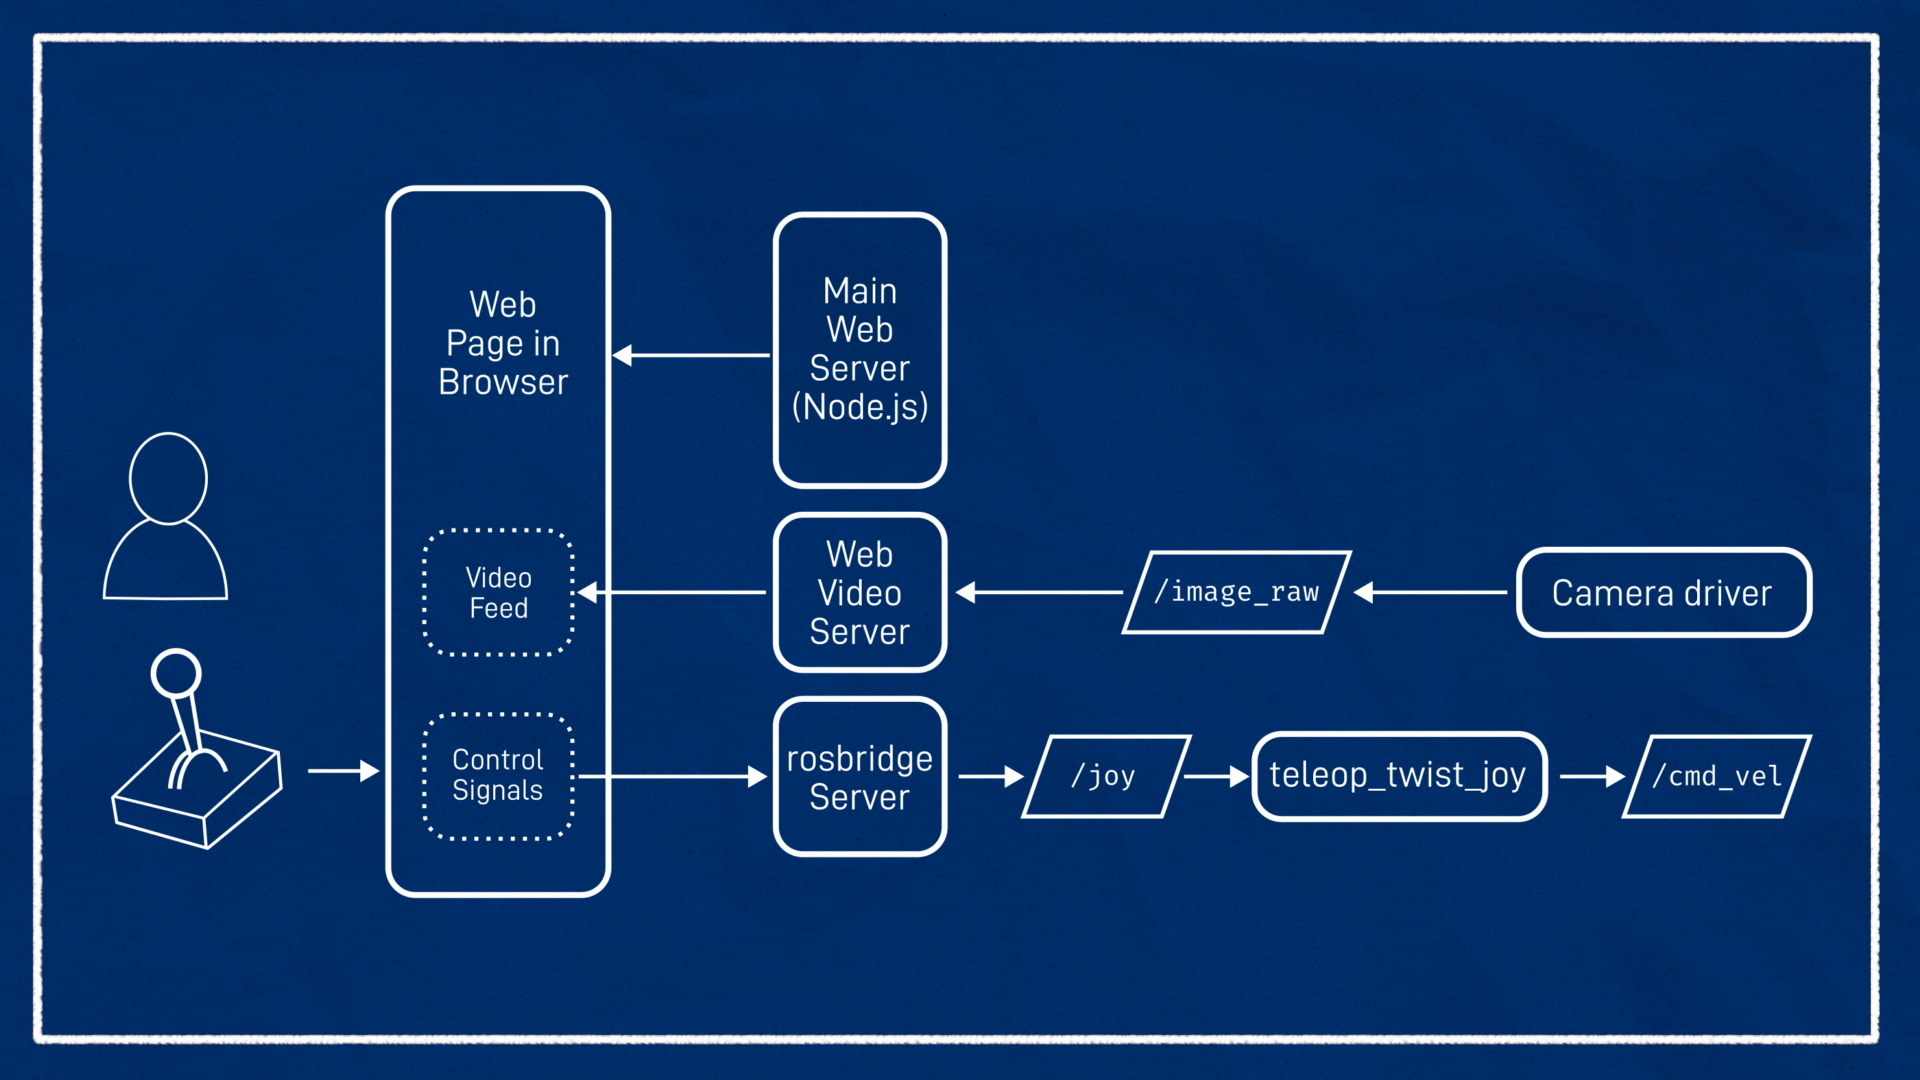
Set up image feed
Something immediately obvious on this page will be the image display that is broken. To fix this, we will run a small server directly on the Pi that serves up Image topics as webcam-style image feeds.
On the Pi (can alternatively be done on the dev machine):
- Install
ros-foxy-async-web-server-cpp(with apt) - Clone the ROS2 branch of
web_video_serverinto a ROS workspace (e.g. ourrobot_ws) withgit clone -b ros2 [https://github.com/RobotWebTools/web_video_server.git](https://github.com/RobotWebTools/web_video_server.git) - Rebuild the workspace with colcon
- In two different tabs, source the workspace, launch the camera driver (like normal), and run
ros2 run web_video_server web_video_server
Then, back in the browser on the dev machine the image feed should be working. If not, try navigating to <pi IP address>:8080. This should list the available topics and you can click on them to check they work. If all is fine, check the IP address and ROS topic set in ros-ui-react/example/src/RealGamepadDemo.js.
Set up controls
Now that the image feed is coming through, we need the control signals to be published to ROS on /joy. We'll do this using rosbridge, a suite of libraries and tools that (among other things) let us interact with ROS in the browser with Javascript, communicating to a server via WebSockets.
- Install
rosbridge_suiteon whichever device will be receiving control commands withjoystick.launch.py(in my case it was the dev machine)- Normally this should work with
sudo apt install ros-foxy-rosbridge-suite - However I had some trouble with that and had to build it from source
- Normally this should work with
- Run
ros2 run rosbridge_server rosbridge_websocket - Modify
joystick.launch.pyto not launchjoy_node(since the/joytopic will now come from rosbridge). You may want to add launch arguments to toggle this behaviour. - Launch
joystick.launch.py - Start your ros2_control controllers on the robot (ensure your robot is in a safe position)
- Open the browser on the dev machine and start driving your robot around
If the controls are not working correctly...
- Visually check that the buttons are showing up on the screen, and that your enable buttons are the same as they were for a direct connection (and if not, modify
joystick.yaml) - Echo the
/joytopic to ensure that the button presses are coming through
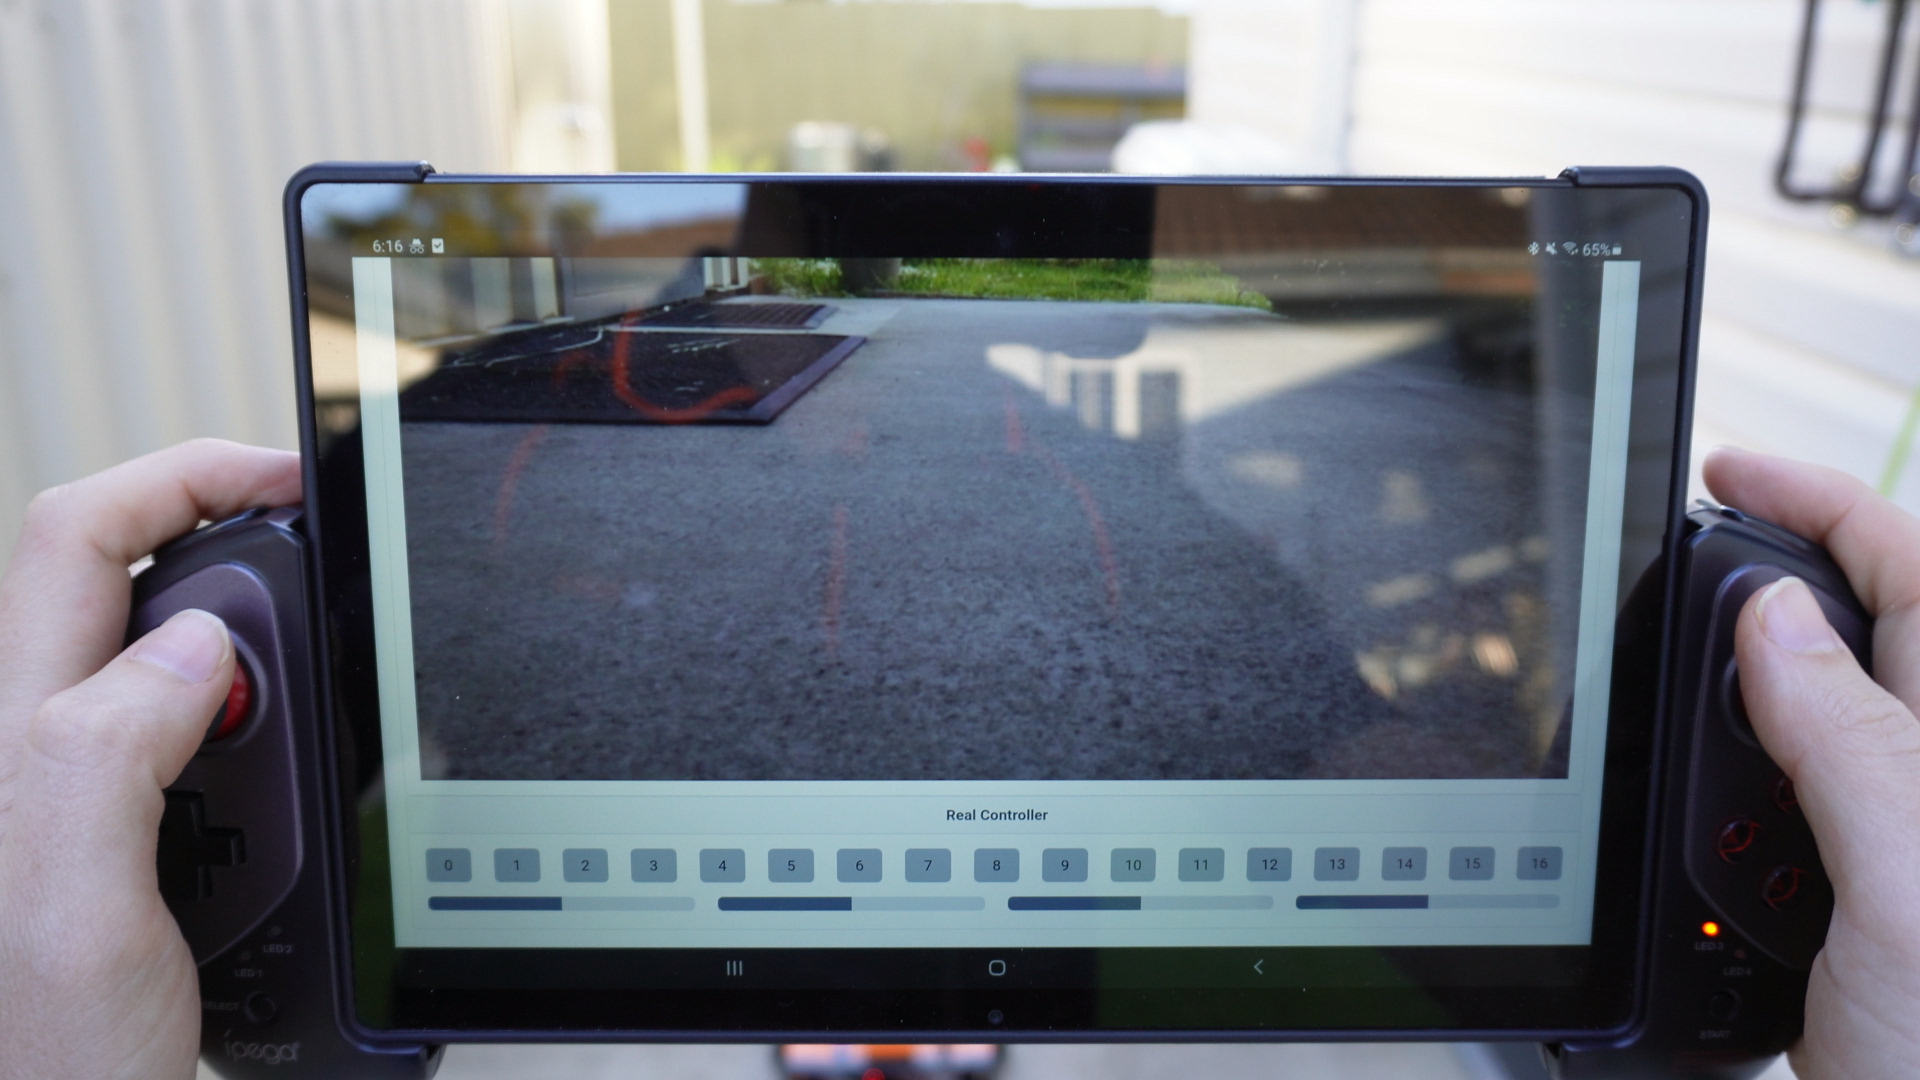
Run on phone/tablet
Now that we have all the desired functionality in the browser, we can try it on other devices.
- Connect your device to the same Wi-Fi network
- Connect a gamepad to your device via USB or Bluetooth (optional, you can instad use the simulated gamepad with on-screen buttons)
- Navigate to the address in your browser
- Optionally "Add the webpage to your home screen" (easier to access and removes address bar etc taking up space).
- Note that in all likelihood, the button configuration will be different so you may need to adjust
joystick.yaml - If using the on-screen buttons, you will probably want to set
require_enable_buttonto false (injoystick.yaml) as using the dead-man's switch does not work well on the touchscreen
Foxglove
Shortly after I wrote that tool at the start of 2021, a group called Foxglove sprung up with a new (or revamped) tool called Foxglove Studio, and since then it’s gotten better and better. It is also browser-based, and utilises rosbridge_server. However it is missing one nice feature, as we'll see at the end of this section.
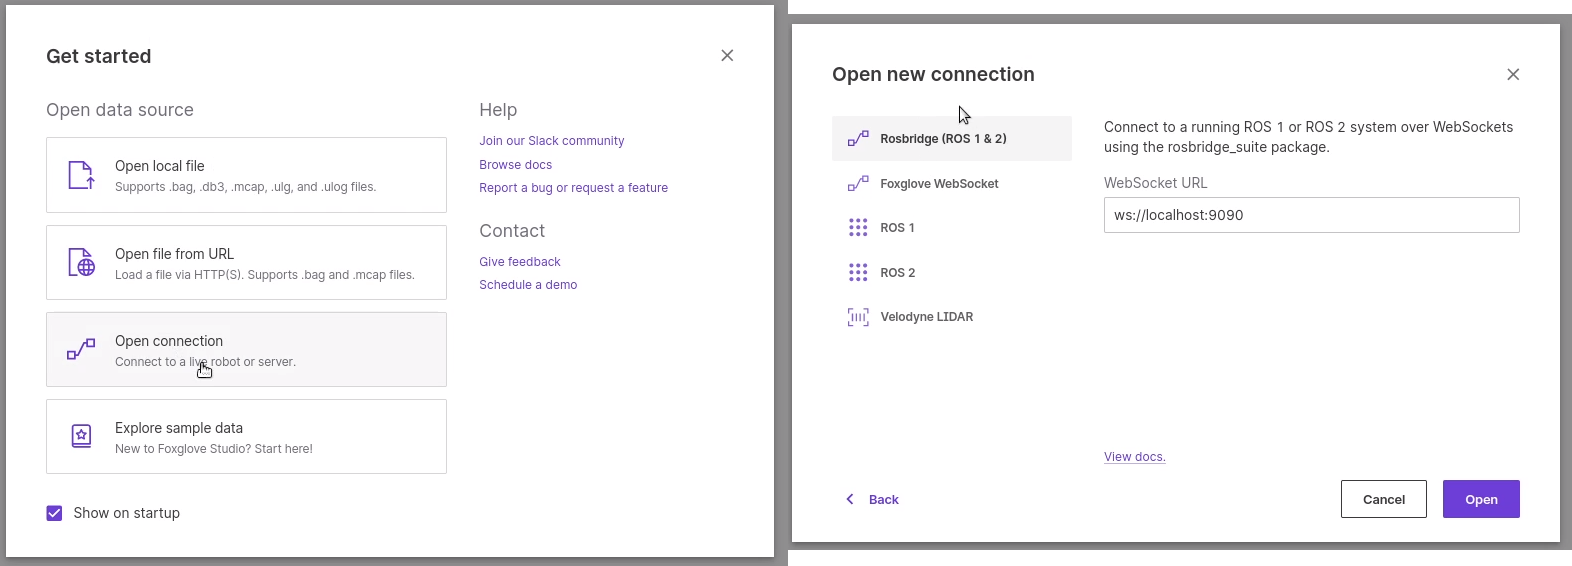
To start Foxglove, you can either install the application on your computer, or navigate to https://studio.foxglove.dev/. It will prompt to select a data source (in this case we want to connect to a live robot, which includes Gazebo), and then to select a connection type. It may be tempting to select "ROS 2", however this mode is very limited (and only works in the app). Instead, select the default option (Rosbridge).
Things won't be working quite yet, and we'll find that it is failing to fetch the topic list. This is because we also need to run rosapi_node, which is part of the rosapi package and will be installed as part of the same process as rosbridge_server (rosbridge_suite).
Note: to make things easier, instead of running
rosbridge_serverandrosapi_nodeseparately, you can runros2 launch rosbridge_server rosbridge_websocket_launch.xmlto launch them together!

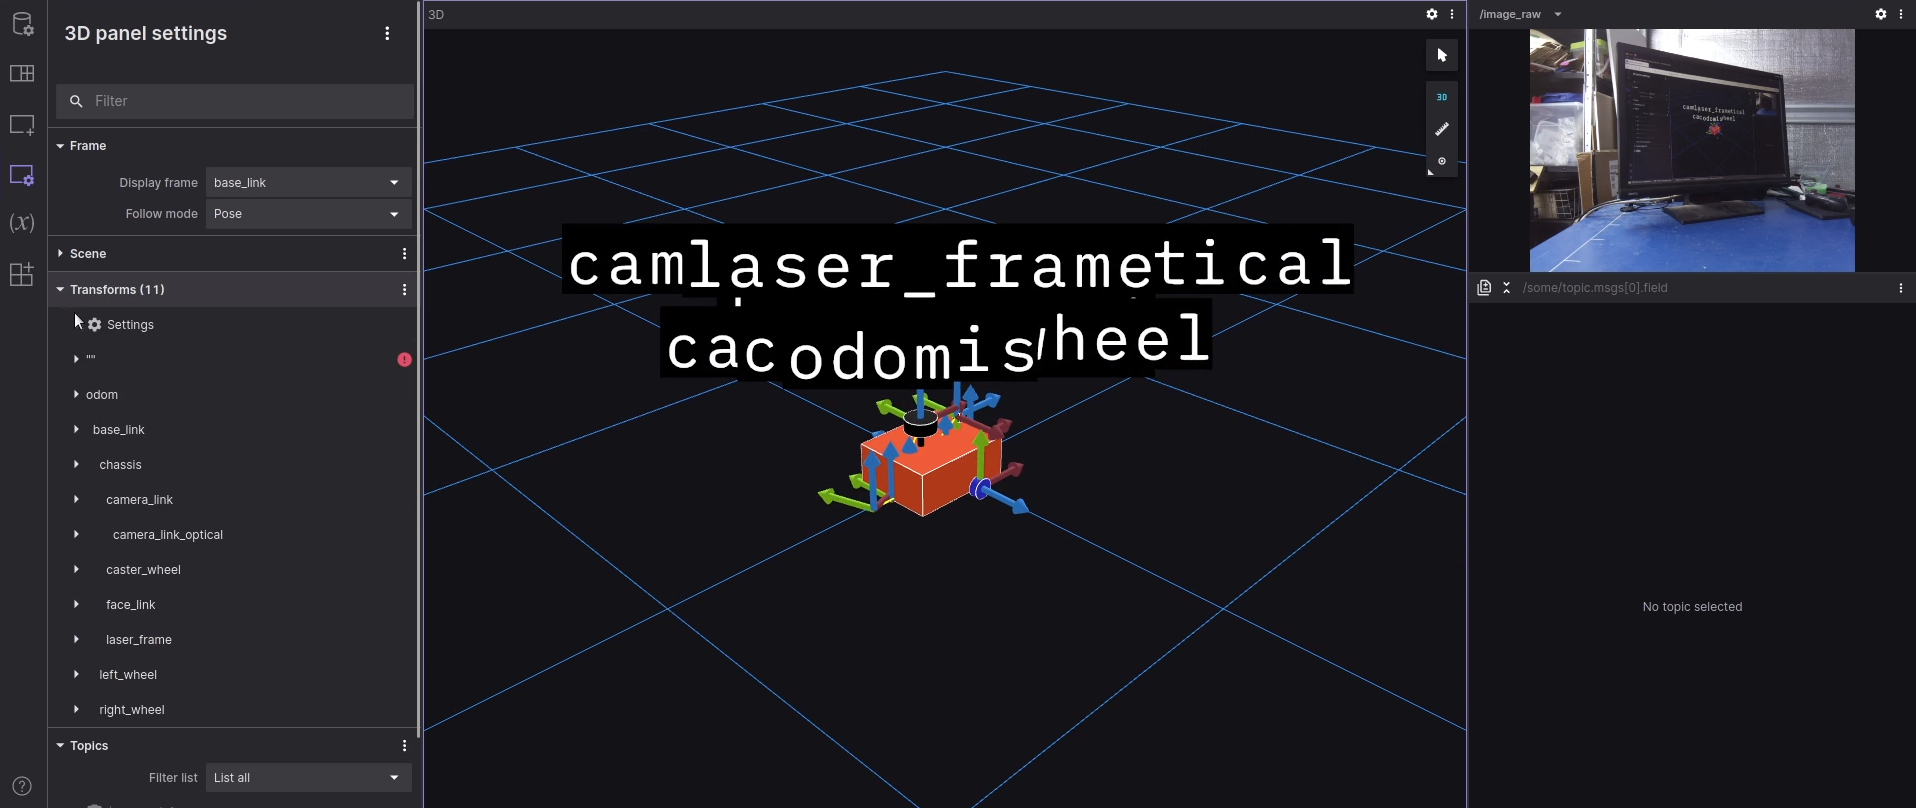
After running the rosapi_node, everything should be up and going! Explore the interface, adding different panels, and see what you can do.
Note: If you try to display lidar data in the Foxglove 3D panel, it may not appear to be working. Try adjusting the display settings for it, particularly the size, colour type, and opacity, and it should become clearly visible.
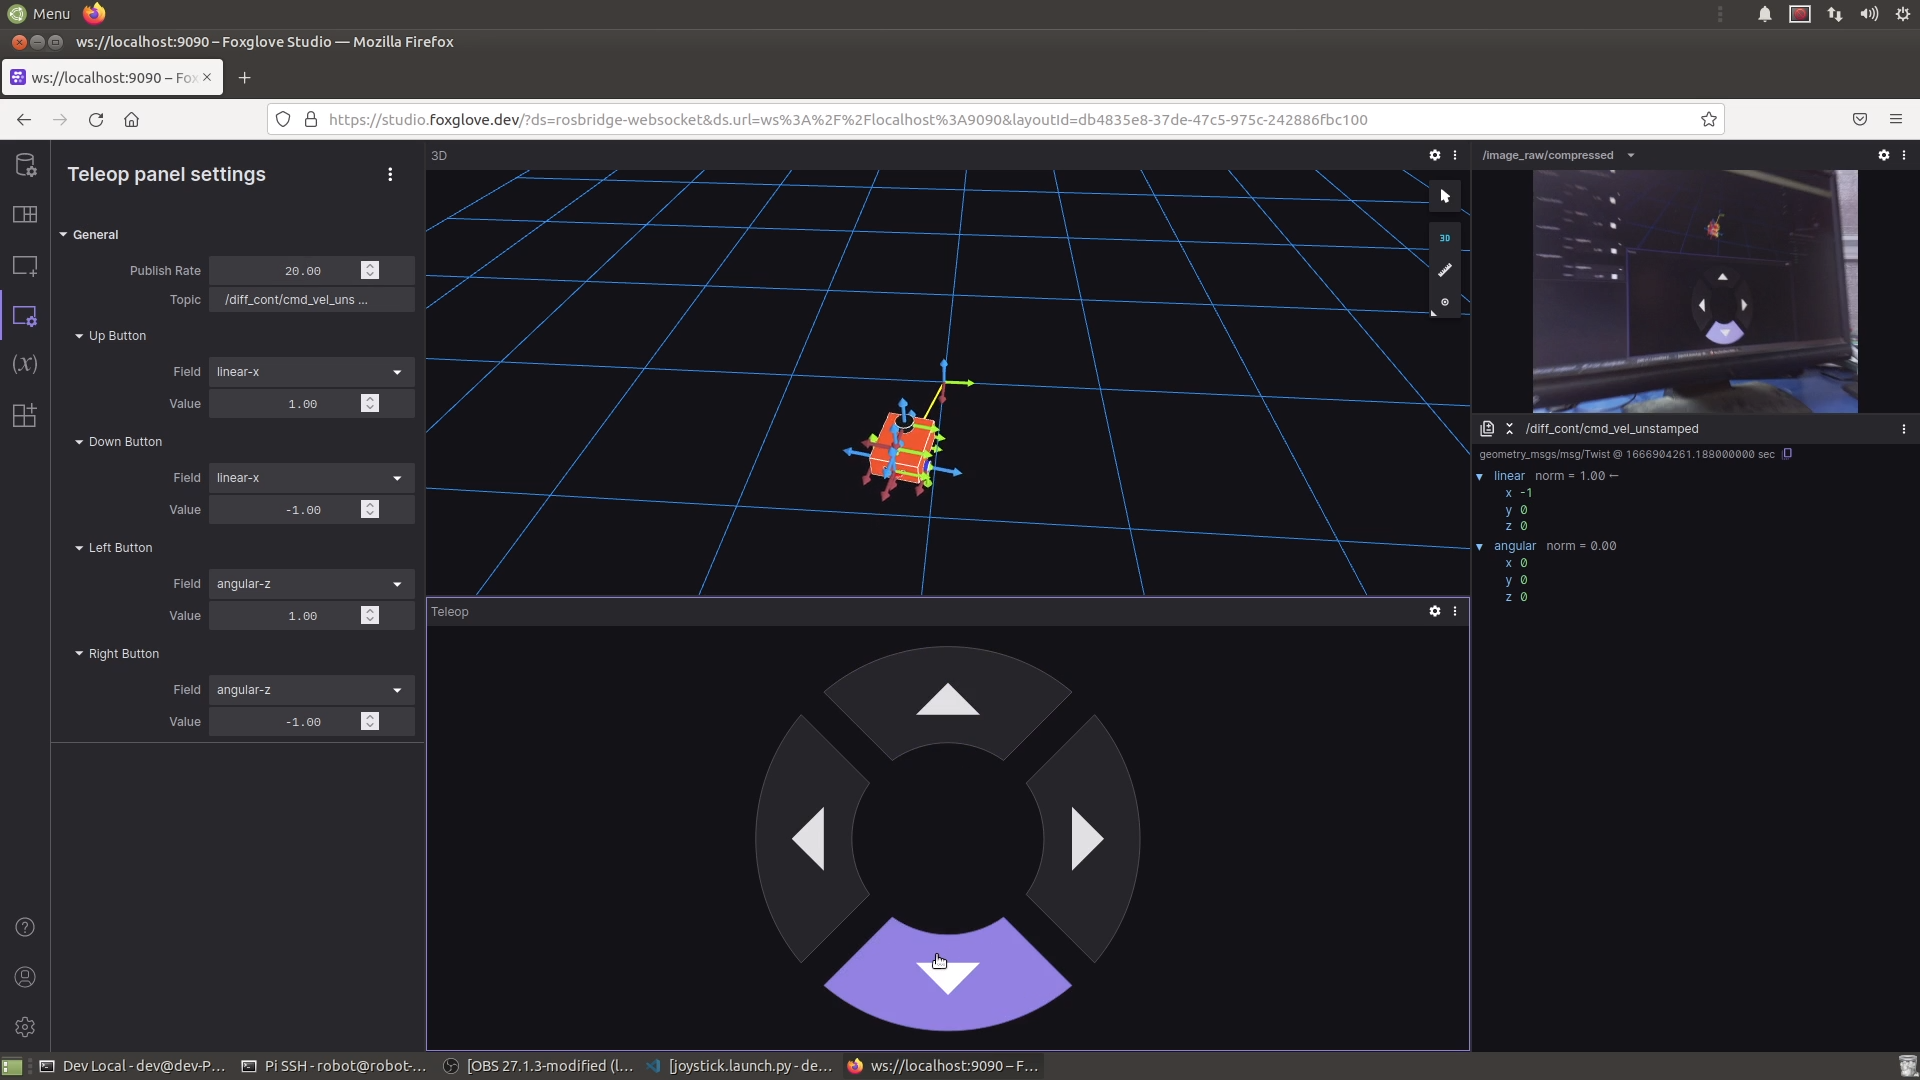
One useful panel is the Teleop panel, from which we can drive our robot. This panel directly publishes Twist messages (the topic must be configured in the panel settings). Unfortunately, there is currently no way to connect a gamepad directly to Foxglove, and use the bluetooth controller like we did previously. Hopefully this will be added one day, and in the meantime I have been working on an example extension panel that you can install to try it out.
Extra Tips
Below are a bunch of extra tips, tricks, and improvements for our robot's teleop system.
Teleop from RViz
Sometimes it would be convenient to be able to run teleop directly from RViz. The ROS 1 RViz plugin tutorials had an example that did exactly this, unfortunately, the port for ROS 2 was never properly completed. While there is no apt package available, there is a branch on the git repo that works, so we can clone it to our workspace and build it.
git clone -b port-plugin-tutorials [https://github.com/ros-visualization/visualization_tutorials.git](https://github.com/ros-visualization/visualization_tutorials.git)
Then, next time we run RViz, we need to make sure we source our workspace first - this will tell RViz how to find the plugin.
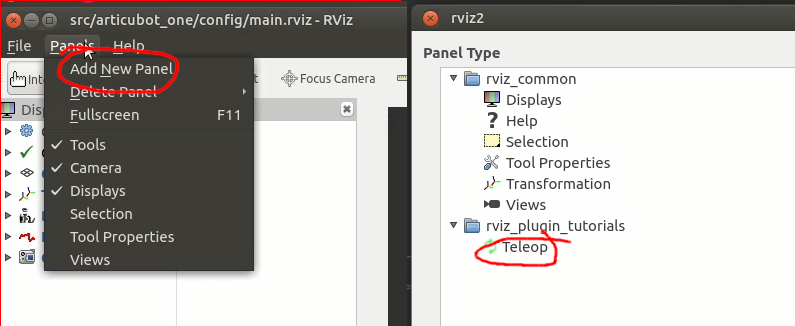
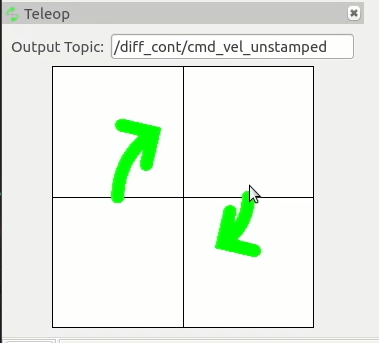
Once RViz is up and running we can add a teleop panel, set the output message, and drive it around! Remember to stop your joystick launch first if it’s still running.
Stamped/Unstamped Twist
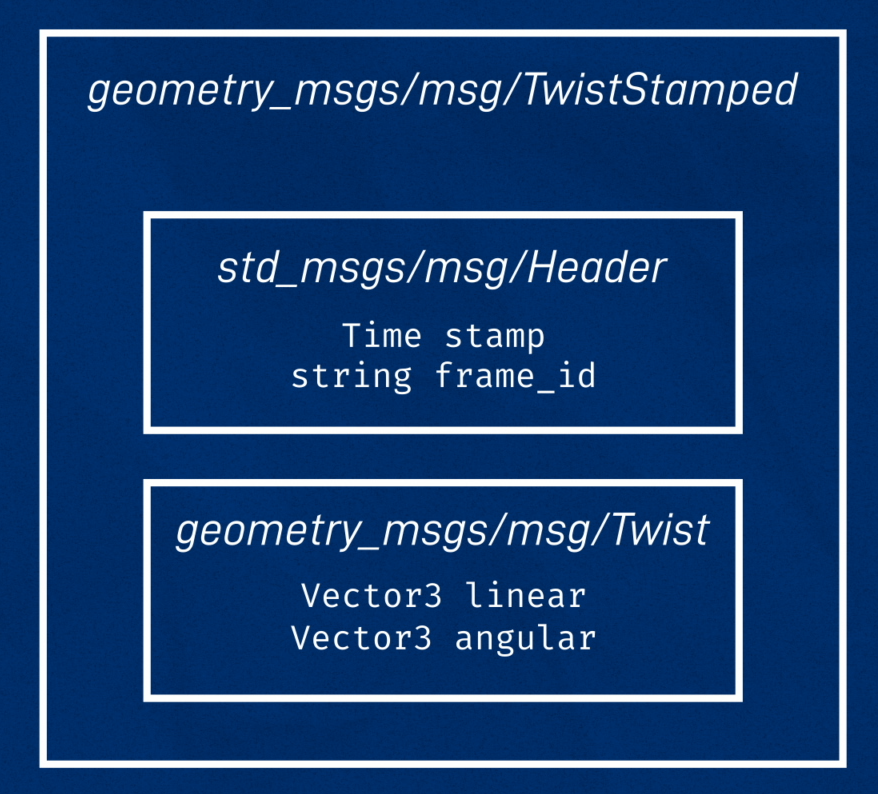
Something you might have noticed keeps coming up is Twist and TwistStamped. A TwistStamped is basically just a Twist with a time and transform frame associated with it.
Why would we want that?
Well, let’s say we have network troubles and suddenly our velocity requests are taking 10 seconds to get through. Executing commands we sent in the past can potentially be very dangerous. By checking the time associated with the command, the controller could reject any requests that are too old, keeping things safe. Also, by using the provided reference frame, a controller could transform the request appropriately.
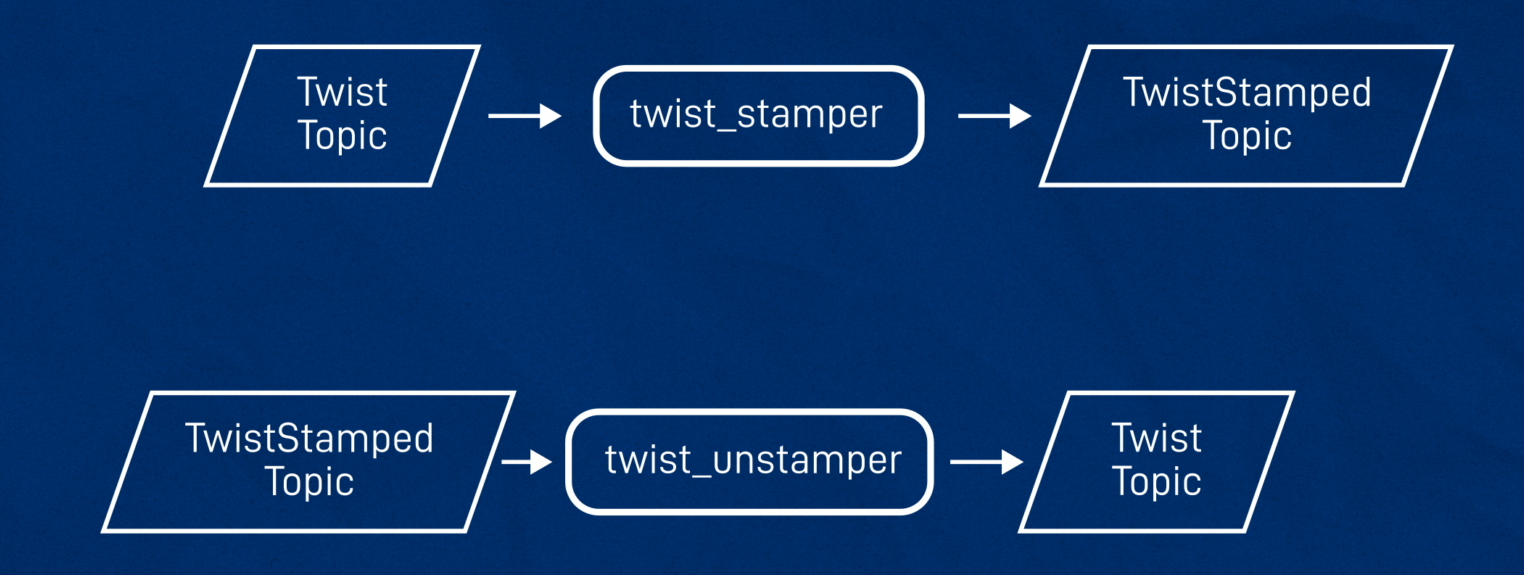
When I started this project a couple of years ago, the diff_drive_controller only accepted TwistStamped - quite reasonably. But all the teleop tools published Twist instead. So I wrote a tool called twist_stamper that simply takes a twist in and spits out one that is stamped with the current time. It also comes with another node called twist_unstamper that does the opposite. It may be that you’ve configured the controller to take an unstamped velocity, but then you have a path planner that spits out twiststampeds. You can just strip the timestamp off and move on.
Two things to keep in mind when doing this are:
- Using
twist_stamperdoesn’t magically make things safe, there are still opportunities for delays to be introduced (especially if you were to run the stamper on the robot itself with the gamepad on another computer). But it’s one step better. - If your
TwistStampedsource computer (dev machine in this case) and the Pi don’t have clocks synced, you’ll have problems, but you were probably going to have problems with SLAM and other similar tasks anyway.
A very brief summary of how to upgrade our project to use twist_stamper:
- Install twist_stamper (
sudo apt install ros-foxy-twist-stamper) - Add another node to our
joystick.launch.py, that runstwist_stamper - Configure the remapping,
twist_stamperexpects you to remap/cmd_vel_inand/cmd_vel_out.- To create a drop-in replacement, we want to remap from
/cmd_vel_into/diff_cont/cmd_vel_unstampedand from/cmd_vel_outto/diff_cont/cmd_vel - Alternatively, we could remove our current remapping in
teleop_twist_joy, so that it defaults to/cmd_vel, and then simply remap/cmd_vel_into/cmd_vel.
- To create a drop-in replacement, we want to remap from
- Update
my_controller_params.yamlto setuse_stamped_veltotrue
twist_stamper = Node(
        package='twist_stamper',
        executable='twist_stamper',
        remappings=[('/cmd_vel_in','/diff_cont/cmd_vel_unstamped'),
                    ('/cmd_vel_out','/diff_cont/cmd_vel')]
      )
Then start everything back up and it should work! The procedure to use twist_unstamper is very similar.
Note that for the rest of the tutorials I will be assuming that this has NOT been done, and that we are still using unstamped command velocities.
Gazebo/Sim Time
As always, we should account for sim mode when using Gazebo.
We can simply add a launch argument called use_sim_time, defaulted to false, and map that as an extra parameter to each of these nodes (this process is the same as previous tutorials).
joy_node = Node(
        package='joy',
        executable='joy_node',
        ### ------------------
        parameters=[joy_params, {'use_sim_time': use_sim_time}]
        ### ^^ Updated line ^^
      )
Now when we are going to use Gazebo, we should launch joystick.launch.py with use_sim_time=true.
Launch files
On the topic of launching, we can take things a step further by including joystick.launch.py in our other launch files. As an example, I chose to include mine in launch_sim.launch.py with use_sim_time set to true so that whenever I am running a simulation I have the controls available (as always remember to add it into the LaunchDescription at the end too). If this becomes an issue we can easily disable it later.
joystick = IncludeLaunchDescription(
            PythonLaunchDescriptionSource([os.path.join(
                get_package_share_directory(package_name),'launch','joystick.launch.py'
            )]), launch_arguments={'use_sim_time': 'true'}.items()
)
If you’re connecting the gamepad directly to the Pi when driving it, you could also add it to the launch_robot.launch.py (remember to leave use_sim_time off or false).
An even better approach would be to add extra arguments to these launch files that enable or disable the joystick inclusion for easy toggling!
Using the old Linux Joystick Interface
Something mentioned in the previous tutorial is that Linux has two different drivers for interfacing with joysticks, the older joydev interface and the newer evdev interface. The new way is usually preferred but sometimes the old way may be required (especially with unusual configurations, like Docker).
If you’re having trouble getting your gamepad to work with ROS, but it’s showing up fine in jstest or jstest-gtk, then try the old driver. The package is joy_linux and the node is joy_linux_node. Most of the other parameters are the same, except we set the device as a Linux device path, e.g. device:=/dev/input/js0.
New teleop_tools package
One last thing to briefly mention (in case you stumble across it) is that there is actually another package you can use for the joy-to-twist conversion and that’s joy_teleop from the teleop_tools stack. I’ve not actually used it myself, but it seems to be a much more powerful tool that lets you map whatever buttons and axes to any messages and services that you want, so that could be Twist or TwistStamped but it could also trigger actions or send joint references for an arm or something.
For the rest of these tutorials, however, we'll stick with teleop_twist_joy.
Conclusion
Together these last two tutorials have been a fairly comprehensive overview of teleoperation of our robot. Now that teleop works, the next step is automation, and we’re going to start looking at some of the more complex algorithms we can experiment with. Specifically, the next few tutorials will be on:
- Running SLAM with our lidar using
slam_toolbox - Autonomous navigation with Nav2
- Using the camera as an input for our robot to chase a moving target