Networking
In the previous post we saw all the things we need before we get started with ROS. But before we go ahead and actually install ROS, we need to make sure we get our our network connections set up properly.
When you think about building a robot, being able to talk over a network seems like a really good idea as it lets us do things like:
- Remotely control our robot
- Have Robots that work together
- Split computation between multiple machines
Normally it's a pain to write all the code to do this, but if we're using ROS all the hard stuff is done for us! All we need to do is make sure our devices are set up on the network together.
This is the second post in a series on getting ready to build robots with ROS, and we'll be looking at how we can set our network up well to avoid issues down the track. We’re going to cover:
- Choosing a network structure
- Using Netplan to configure the network settings
- Setting up remote access
- ROS-Specific networking settings
As an example I’ll be setting up the network for my recommended ROS development environment, if you want to know more about that, go and check out the previous post in this series.
Choosing a network structure
There are many different ways that we can structure our network, and the exact setup is going to be dependent on your individual requirements. There are a few key functions we need our network configuration to provide:
- A fast, reliable connection between the Pi and base station (and any other devices) to send ROS messages
- A reasonably easy way to connect both machines to the internet to download ROS packages
- General control over the network (e.g. being able to set static IP addresses)
Keeping these requirements in mind, we're going to cover three broad categories of network structure we can use: existing network, ad-hoc network, and dedicated network.
Existing Network
The simplest way to set up your network is to use an existing network such as your home, school, or workplace - you've probably already done it! With the Pi connected via Wi-Fi and the base station connected via Wi-Fi or ethernet, both should be able to communicate with each other and access the internet.
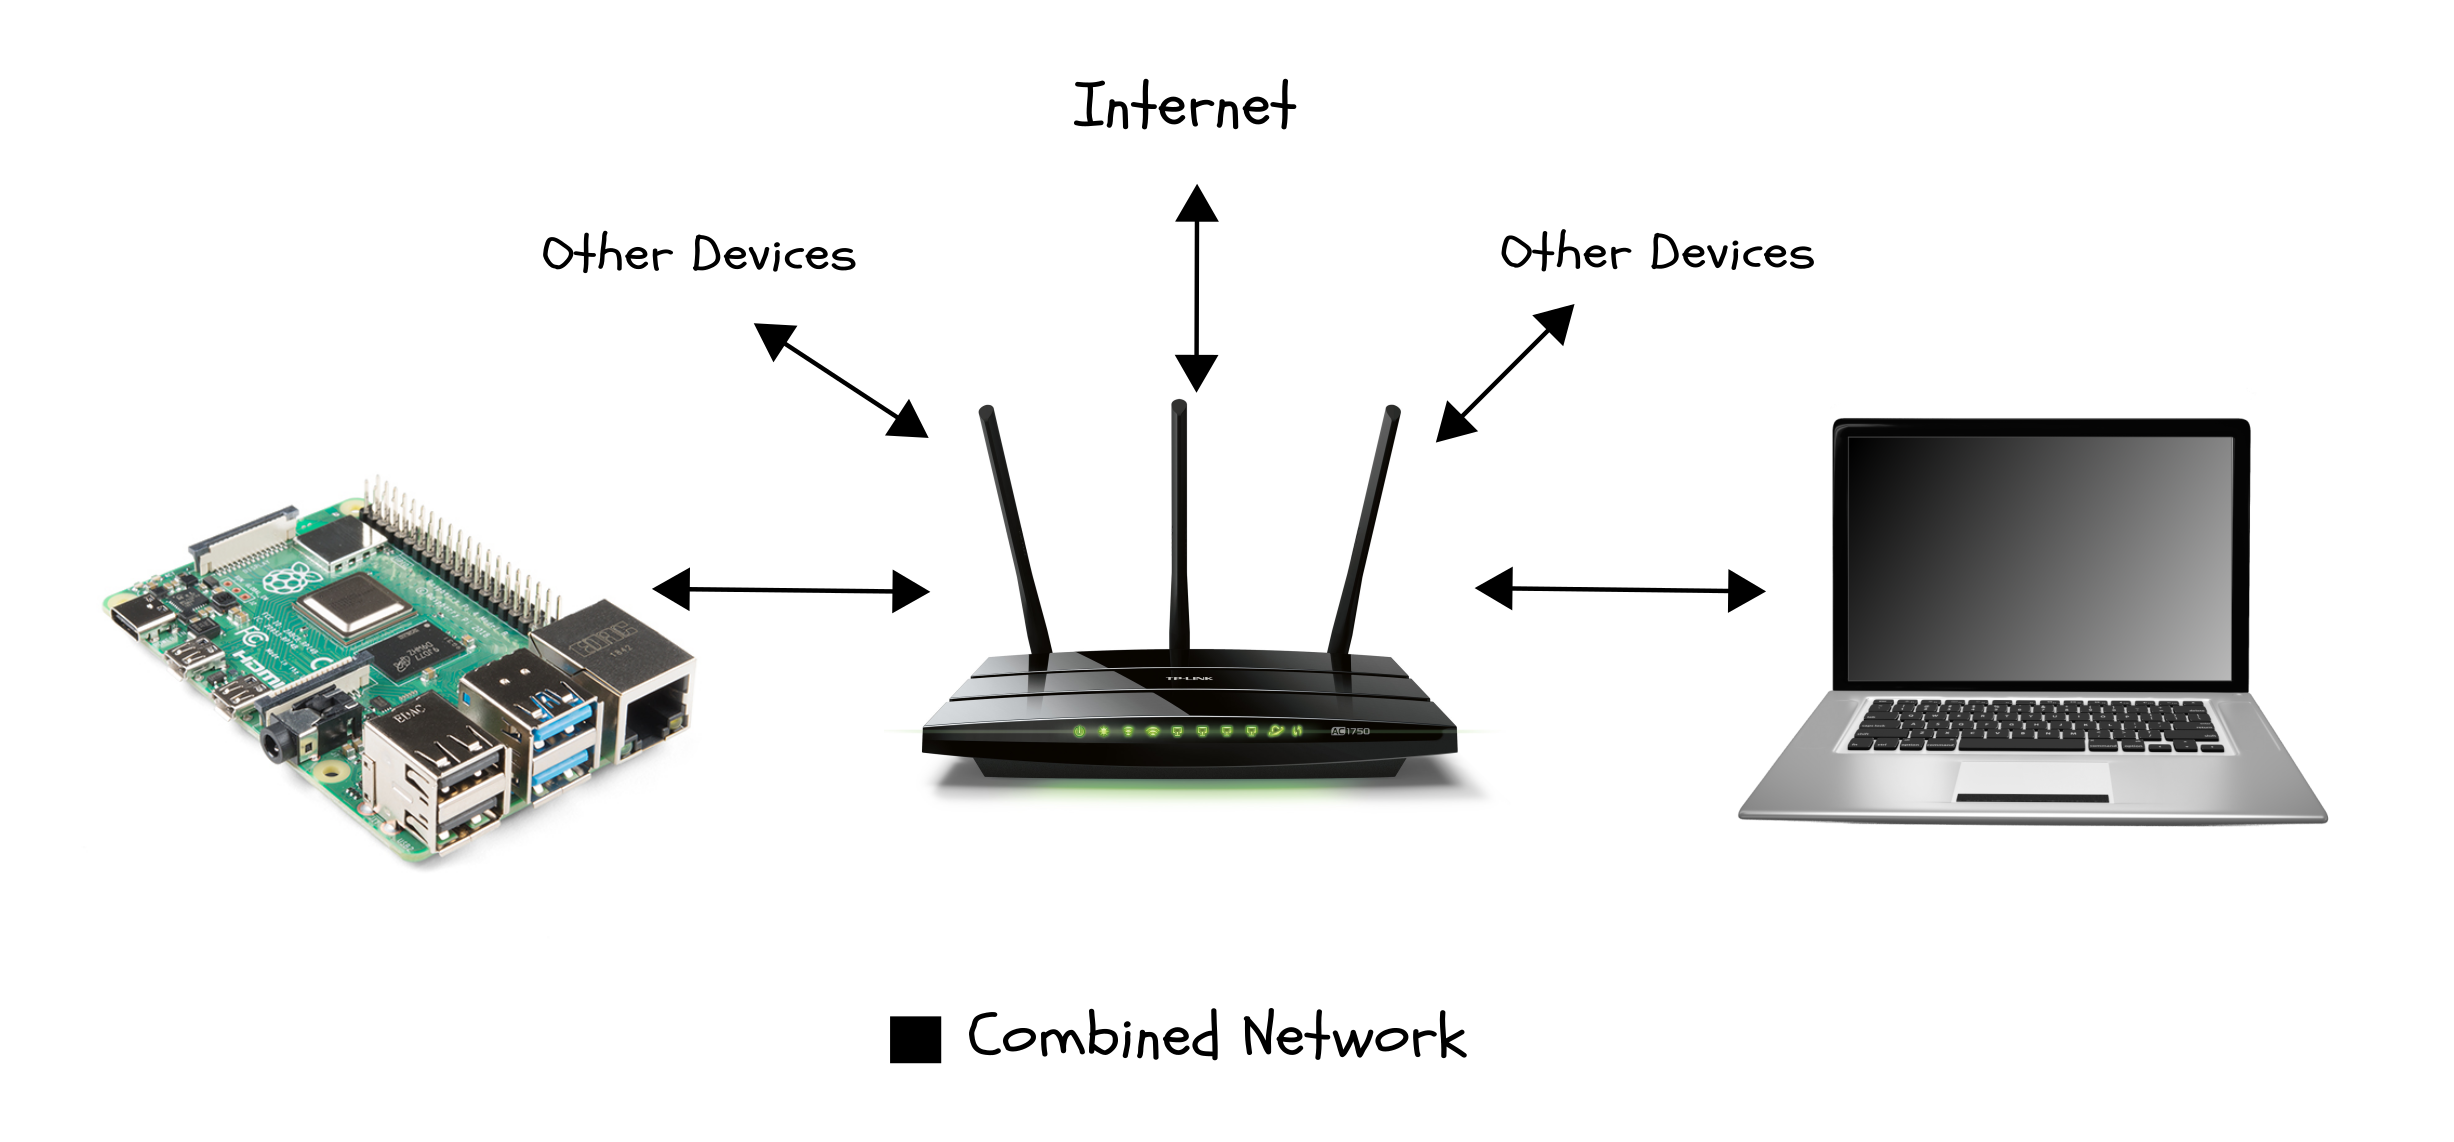
For many people this will be fine and you can skip this step. However, it's worth being aware of a few issues you might come across:
- Lack of control - Depending on the context we may have little or no control over the network. This may lead to difficulties with DHCP/static IP conflicts, network congestion, or dropouts.
- Fixed to a location - If we want to relocate our whole set-up (e.g. to do an outdoor field test or demonstrate at another location) then our robot and base station will no longer be able to communicate with each other.
- Potential ROS conflicts - If you have multiple independent ROS setups on a single network, (e.g. in a classroom) they can conflict with each other. ROS has its own solution to this (see the end of this post), but in many situations it will be easier to just keep them on separate networks.
If any of these issues could apply to you, you might want to consider one of the next two options.
Ad-Hoc Network
An alternative way to set up our network which offers more flexibility is to use an ad-hoc network (or similar). Under this configuration, we configure one of the devices (typically the base station) to generate its own Wi-Fi network, and set up the other to automatically connect to it.
To access the internet, we use a second network interface (either Ethernet, or a second Wi-Fi card) on one of the devices, and then share that internet connection to the other devices on the newly created network. By using this method, the base station and robot can remain connected to each other regardless of what external connections they have, but can also take advantage of those connections when available.
This method can be very flexible, however some drawbacks are:
- Requires more effort to configure
- Requires a second Wi-Fi card (e.g. USB Wi-Fi dongle) or more complex settings if you don't have wired internet access
- Becomes difficult if you have multiple "base stations"
To avoid these drawbacks, we can move on to option number three, a dedicated network.
Note: I've used the term "ad-hoc", but in my limited experience, things will work better if you set the base station up as an "ap" (access point) network rather than ad-hoc due to how the underlying technology works. The main thing to grasp here is the concept, and you'll need to figure out the best settings for your own network.
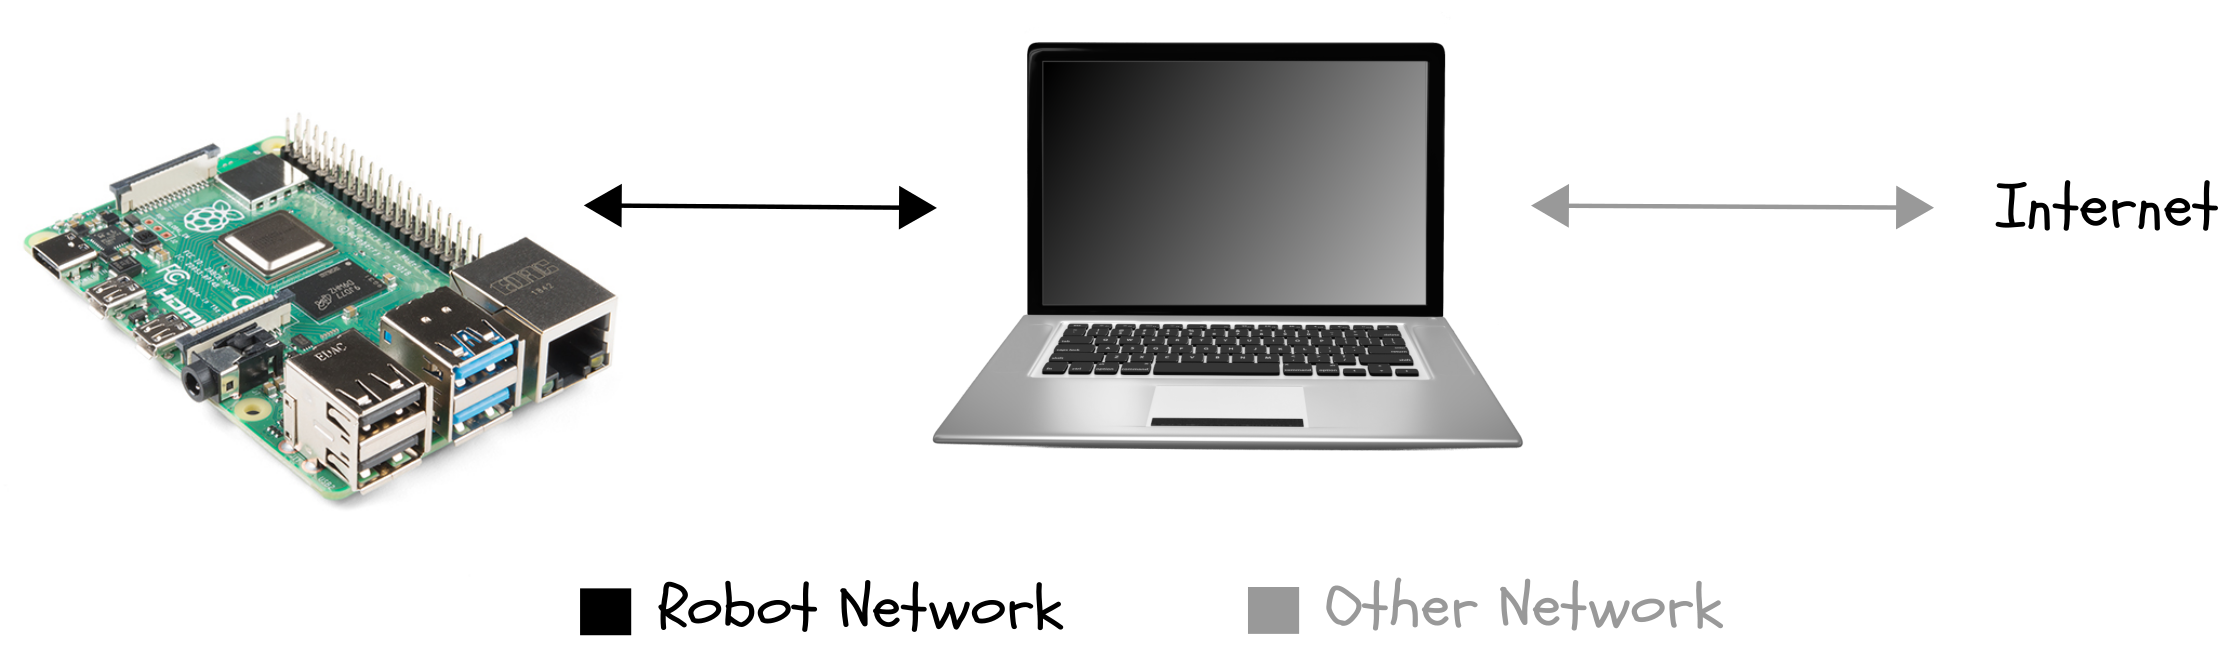
Dedicated Network
The third (and my preferred) approach is to set up a dedicated network. As with the ad-hoc approach, the tricky thing here is how to ensure that all the devices still have an internet connection as well as being able to communicate with each other. A handy piece of equipment that solves these issues is a travel router.
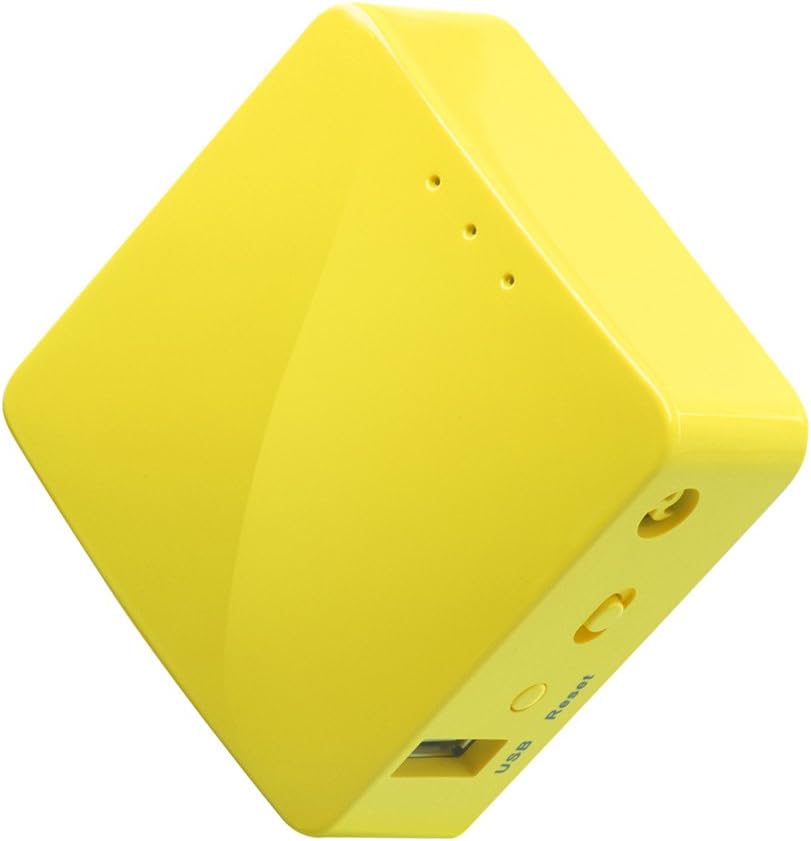
These small, portable routers are designed to connect to the internet via one network (by ethernet, Wi-Fi, or USB tethering), and bridge that connection to its own network (on both ethernet and Wi-Fi).
Normally, the idea is that when you're traveling, rather than having to reconfigure the Wi-Fi and/or VPN on every device you have, everywhere you go, you only need to connect your devices to the travel router once. As you travel, you then simply connect the router to whatever networks you have access to, and all your devices will have an internet connection.
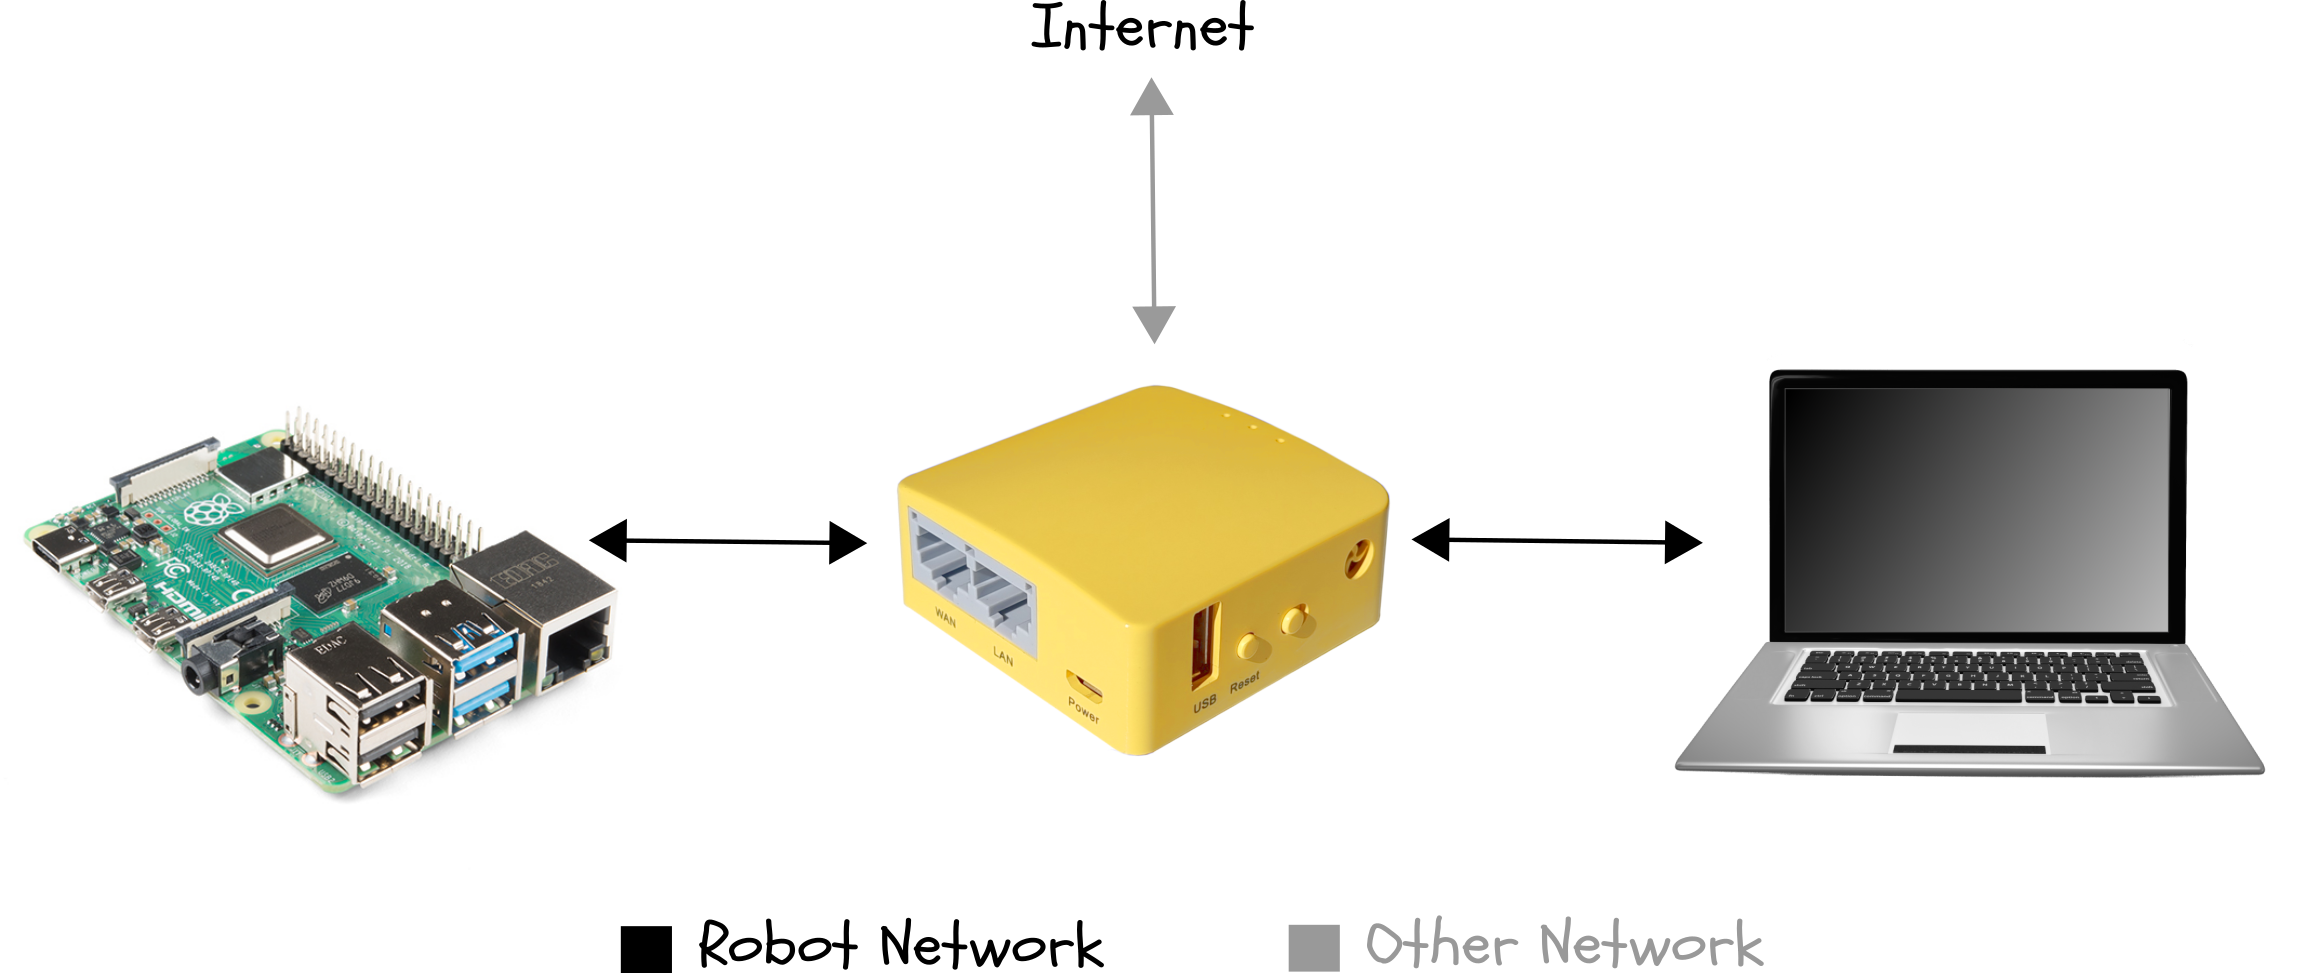
It's not too hard to see how similar that is to our robot scenario - we want our robot, base station, and any other related devices on their own little network, with internet access optionally bridged from an external source.
The exact configuration will depend on your hardware and needs, but one possible example is pictured below. The travel router receives its internet connection via Wi-Fi, and bridges this to its own network over both Wi-Fi and ethernet. The robot can connect via Wi-Fi and the base station can connect via ethernet, while also supplying USB power to the router (if the hardware permits). This also leaves any other network adapters (e.g. Wi-Fi) on the base station to connect to other networks if required.
Being a small, portable router, these travel routers won't have quite the same performance as a traditional router, so if this becomes an issue you may need to upgrade to a larger, wall-powered model. The other obvious disadvantages are that it will cost you a little extra to purchase one, and it is yet another device to keep track of. Certain phones also have the ability to act as Wi-Fi repeaters and could be substituted, however at that point an ad-hoc network would probably be a more straightforward approach.
Using Netplan to configure the network settings
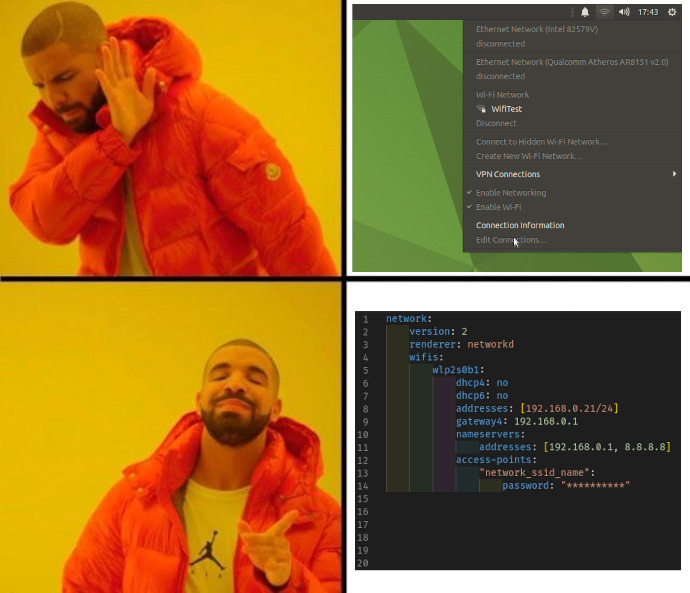
Now that we have decided on our network structure, we need to configure the network settings on each of our devices. The most obvious way to do this is to use the Network Manager settings in the top-right corner and skip this section, however there is an alternative (and in many cases, better) method using the built-in tool netplan.
What is Netplan?
Netplan lets you configure your network by writing a config file, which (compared to using the GUI) is easier to change in a terminal, back up, or share between computers. Netplan doesn't actually handle any of the networking, instead it just takes some config files in a simple, generic format, and translates that to whatever is required for a particular OS.
The instructions below will cover an example of how I set up my machines with netplan, you might need to do things a bit differently for your particular network. The exact file contents will depend not only on your chosen network structure, but also your individual hardware (I am using the GL.iNet Mango Router, already configured to repeat my home internet with default settings).
Decide on your settings
Before we write the config file we need to figure out what settings we want to set (or not set). This will generally include:
- Network interface name (this is what Linux uses to identify the connection)
- DHCP on/off
- IP address and subnet
- Gateway
- DNS Server (a.k.a. nameserver)
- Wi-Fi SSID and password (for wireless networks)
To find the name of our network interface, we need to type the command ip addr into a terminal, and we should get something like the following:
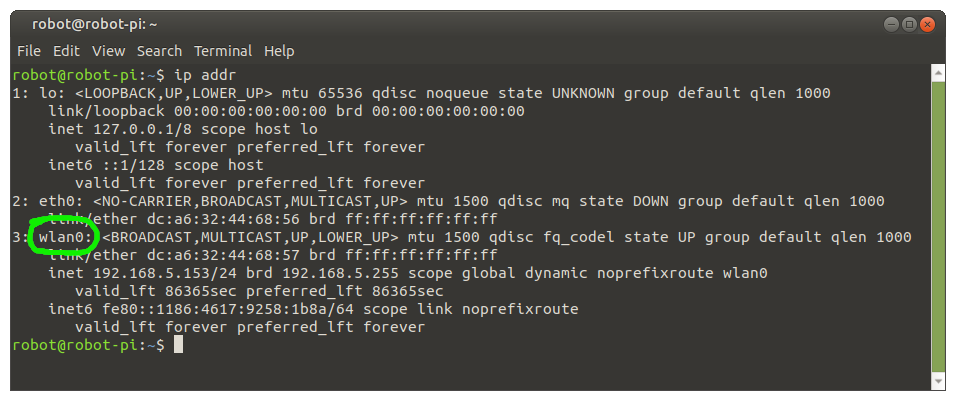
This looks pretty confusing but the only thing we care about is the word just to the right of the numbers on the left. In this case we have lo, eth0, and wlan0. Generally, ethernet ports start with e and Wi-Fi cards start with w. If you're already connected, you should also see your current IP address listed below next to the word inet.
You'll need to figure out the rest of the settings yourself - for example I already know the router IP address (gateway and nameserver), I have chosen static IP addresses that I know are outside the DHCP range for this router, and the router's SSID and password are (but probably shouldn't be!) left as default.
Writing the config file
Now that we've decided what settings we want, we can write the configuration file. Netplan normally looks for its config files inside /etc/netplan/, and a clean Ubuntu installation should already have an almost empty file in there called 01-network-manager-all.yaml. We could edit this file if we wanted to, but it's cleaner to create a second one. You can call it almost anything you like, but 02-my-network-config.yaml is nice and simple.
Creating this file requires root access, so you can either create it wherever you like and use sudo cp to copy it over, or create it with root directly. For example, to create it using the pluma text editor, you would run sudo pluma /etc/netplan/02-my-network-config.yaml.
Note, Netplan will process the config files lexicographically (alphabetically), so files with a "later" name can override items in files with an "earlier" name.
Shown below are the contents of the config file for my two machines (the Pi and the base station). Hopefully these examples are enough for you to use as a template, but if you get stuck or need something more complex, try taking a look at this tutorial or the Netplan Documentation.
Pi:
network:
  version: 2
  renderer: NetworkManager

  wifis:
    wlan0:
      dhcp4: no
      addresses: [192.168.8.51/24]
      gateway4: 192.168.8.1
      nameservers:
        addresses: [192.168.8.1]
      access-points:
        "GL-MT300N-V2-672":
          password: "goodlife"
Base station/Dev machine:
network:
  version: 2
  renderer: NetworkManager

  ethernets:
    eth0:
      dhcp4: no
      addresses: [192.168.8.50/24]
      gateway4: 192.168.8.1
      nameservers:
        addresses: [192.168.8.1]
Activating the changes
Once you have populated the config file, run the two commands below to process the file and then apply the settings.
sudo netplan generate
sudo netplan apply
If everything went to plan, your network should be up and running! Try checking that the ip address is correct (using ip addr), and pinging other devices on the network.
Setting up remote access
Right now you probably have a screen, keyboard, and mouse connected to your Pi, but this isn't usually practical once the Pi is stuck inside a robot. To get around this we need to set up remote access. I also recommend setting this up on the base station as you never know when it might come in handy.
The most important form of remote access to have set up is SSH. SSH (or secure shell) provides a remote terminal so that we can run commands on another machine without needing a screen attached. We will use this to access the Pi most of the time, since we just need to start a ROS node or launch a script.
In addition to a remote terminal, there are many other tools and features that can utilise the SSH connection, such as:
- Secure Copy, or
scp, a simple tool for transferring files between machines (Examples) - X forwarding, which lets graphical applications run remotely
- VS Code Remote development, which lets you open a workspace over SSH as if it were on your local computer
We install ssh by simply running sudo apt install openssh-server. Once that's done, swap to the dev machine, open a terminal, and run ssh pi_username@pi_ip_address (substituting the name and IP address appropriately). After typing yes to the access prompt and entering the password, you'll have full access to the terminal remotely. Congratulations, now you can unplug your screen, keyboard, and mouse!
Note, there are a whole lot of other remote access methods that we can set up to make it easier to do things like file transfers or run graphical programs. That's outside the scope of this tutorial, however a separate post on this topic is in the works and I'll include a link here once it's finished.
ROS-Specific networking settings
When working with ROS 1, it was required to set some extra environment variables to enable ROS computers to see each other over the network. The nice thing about ROS 2 is that it just works out of the box with no extra network config required! The only time you should need to worry about this anymore is if you are trying to run multiple separate "ROS networks" on a single network (e.g. you are teaching a school class with all students on a common LAN, but you need each of them to have their own "private ROS network"). In this case you will need to set a unique ROS_DOMAIN_ID for each network.
While it is probably better to avoid this hassle by having fully separate networks, one advantage of such an approach is that a teacher could then adjust the domain ID on their machine to assist whichever student requires assistance at the time, or a developer deploying a fleet of independent systems on a common network could switch which one they want to monitor.
If this is something that will apply to your situation, take a look at this link for more info.
Up Next
Now that we have our network all configured we can finally install ROS!
References
- C5ISR Center demonstrates robotic swarming technology with SBIR partner by U.S. Army Combat Capabilities Development Command C5ISR Center, licensed under CC BY 2.0
- Raspberry Pi 4 Image by SparkFun, licensed under CC BY 2.0
- Laptop Image by Tymon Oziemblewski from Pixabay
- TP-LINK Archer C7 AC1750 Dual Band Wi-Fi Gigabit Router by Firecracker PR, licensed under CC BY 2.0